Showing posts with label Recipes. Show all posts

Tuesday, May 30, 2023

Four-Patch on the Diagonal Top Done

I finished the Four-Patch on the Diagonal quilt top last week, and I really like how it turned out!  The pattern is by MaryQuilts.com and can be found HERE.


There is something very cozy feeling about it.  Maybe all those pinky-browns and earth tones.


It measures around 59 x 71 inches, which is a nice throw size.  


I'm not sure whether I will donate or gift it, but, ultimately, it may be a bit harder to part with than I thought it would be.  I guess that's a good thing!

Lost and Found!

We had a look around the garage a couple weeks ago to see if there was anything we needed to get rid of during our city's bulk waste pickup that happens annually in the spring.


One thing we unearthed that I had totally forgotten about was a 29-inch floor standing quilting hoop that had belonged to my late mother.  It was packed away in its original box and stored on a shelf in the garage.


I am not much of a hand quilter and don't foresee using this hoop, so I brought it in the house to take photos of it and post it for sale on Craigslist.


There was a large envelope inside the box with assembly instructions and other information for the quilting hoop—AND, surprisingly, a recipe booklet from my Aunt Inez that she must have given my mom in the mid-1990s!

How that ended up in the envelope inside the quilting hoop box is anyone's guess.  But my parents did move from Wisconsin to Arkansas in 1995, so I can imagine that in the chaos of packing, my mother stashed the recipe booklet in a "safe place" at the last minute.


I don't think my mom ever used the quilting hoop after their move.  She made a few quilt tops during the next couple years, but then she had a stroke that paralyzed her left arm.  She had all of her quilt tops longarm quilted a few years later and gave them to her granddaughters.


It was such a pleasant surprise to find my aunt's recipes some 28 years later!  Here are a couple pages from the booklet.  Having grown up and lived most of her life in Louisiana, it was fun to see a recipe for Crawfish Etoufee.


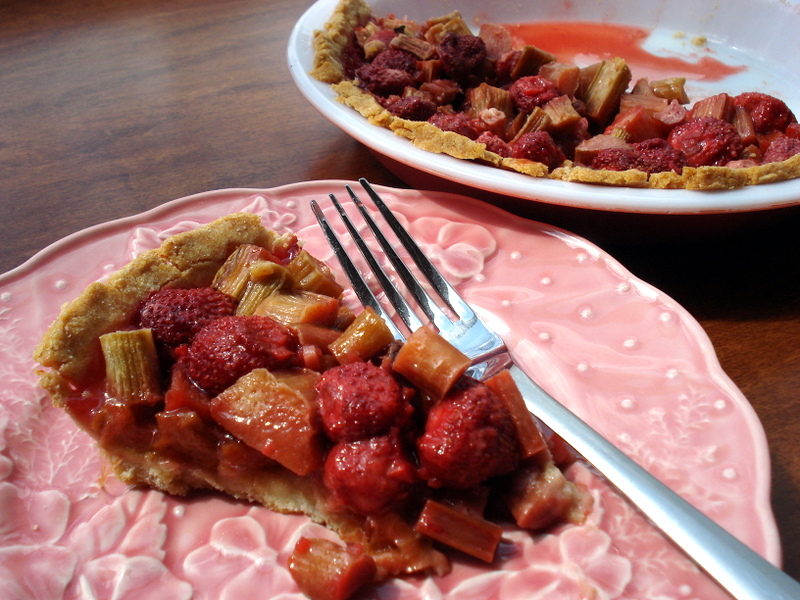
And recipes for some of my grandmother's cakes and pies.


This 1-2-3-4 cake sounds like something that would be good served with fresh strawberries and ice cream.  Strawberry season here is right around the corner.

There are so many other great family recipes in this little booklet, flavored throughout with my aunt's helpful tips, remarks, and admonishments.  It makes me smile!

I'm going to put this in its own three-ring binder and then on my recipe book shelf so I know where to find it from now on.

~Paulette

Saturday, September 17, 2022

Making Mock Apple Pie

Here in the Upper Midwest, September means apple season and all the good things that go along with it.  Apple pie, turnovers, caramel apples, apple crisp—the list goes on and on.  My favorite variety has always been Cortland, followed in close second place by Macintosh, and then anything else that's a bit more tart than sweet. 


So with all the ripe, authentic bounty of the apple orchard, why in the world would I want to make a mock apple pie?  Well, it all comes down to my sensitive digestion (darn it).  I love apples, but they no longer love me. 

You see, apples are a big source of FODMAPs, an acronym for certain types of carbohydrates that IBS sufferers like me have trouble digesting.  I won't bore you with the entire list of delicious foods I've had to break up with, but if you ever need a good cry and want something to tip you over the edge, do an internet search on FODMAPs.

Anyway, as I passed by a loaded apple tree on my walk the other day, I wondered if there was a recipe for mock apple pie that I could eat.  Not the old RITZ cracker mock apple pie (no thanks, gluten) that I remember printed on every box in my youth.  But maybe something made with, say, zucchini?  Zucchini is a low-FODMAP vegetable that I tolerate well and, given its basic blandness, might be amenable to the ruse.  It also happens to be that lucky time of year when gardener friends are desperate to share their overgrown zucchini, the ones that look  like baseball bats.

So I sat down to Google "mock apple pie recipes with zucchini" and found...it's definitely a thing!  

After scanning the ingredient list of a half dozen such recipes, I finally settled on one that had a lower amount of sugar (see the above preference for tart over sweet).  It was this recipe for Zapple Pie.  You're going to want to click that link and save it.  Trust me.


Then I got down to business.  First order of business:  Procure a big-ass zucchini.  Luckily, my sister had just been gifted one and let me have it.  Literally, that is; she didn't bop me with it, although it did resemble a small club.

I substituted my own gluten-free pie crust in this recipe.  I mixed that together and put the pie dough in the refrigerator to chill.

Then I peeled and de-seeded the zucchini and cut it into slices.  The recipe called for 6 cups, but I used 8, thinking it'd cook down (it did somewhat, but surprisingly not that much).  Also, I just like more pie filling.


Next, I simmered the zucchini in lemon juice for 5 minutes, then added in the sugar, spices, and tapioca.  I used tapioca flour in place of the Minute tapioca because that's what I had on hand.  After simmering another 5 minutes or so, it had thickened up nicely and totally looked like apple pie filling!


As that was set aside to cool a bit, I pressed half my gluten-free pie crust into a square glass pan.  My gluten-free crust recipe tends to be crumbly and doesn't always roll out as well as a regular flour crust does, but I've learned that patting it in the pan works out fine.  I patted it in the bottom and about an inch up the sides of the pan.

After the filling was added to the bottom crust, I flattened out the other half of the crust as best I could, then lifted sections of it with a spatula onto the top of the filling.  I proceeded like that, adding sections of crust and fitting them together until the top was covered.

Let's call it rustic.  It sounds nicer than "cobbled together."  By the way, this is the first time I've baked a two-crust pie in a square pan.  I normally use a round pie plate, but I decided to try a slab pie this time.  I may make more pies this way from now on.  Not very pretty, but easier and just as good.


I brushed the top with some almond milk and sprinkled on about a tablespoon or so of coarse granulated sugar, and popped it into the oven.  Pretty soon, the house smelled wonderful!


After it had baked per the directions, I took it out to cool.  I could hardly wait to try it, but I knew it had to cool almost completely before I cut into it.  I went for a long walk.  When I came back it was still a bit warm, but my patience had given out.  I cut a piece and took a bite.


Ding-ding-ding!  It tasted JUST LIKE APPLE PIE!!  Had I not made it myself, I would not believe it wasn't real apple pie!  It hit all the marks for taste, texture, and just the right amount of tangy sweetness.


Yes, yes, yes!  I will definitely make Zapple Pie again!  I know I'm using way too many exclamation points, but I am so stoked that this pie turned out so well.  It's the little things that make me happy!  Except it feels like a BIG win to enjoy a piece of what tastes like real apple pie!

So tell me, have you ever made or eaten mock apple pie?  If you like apples, do you have a favorite kind?

~Paulette

Wednesday, September 18, 2013

Chocolate Beet Cake: Round Two

This one's a keeper!  

Julie, who blogs at Julie Lou, commented last week on my failed attempt at a chocolate beet cake, including a link to a recipe she has used with success. 

So, with a Ziplock bag of fresh beets in the fridge, I gave it a try.  This recipe called for raw, grated beets.  Here are the little ruby gems, peeled and quartered and ready for a spin in the food processor.


I had to change the recipe somewhat to make it gluten free.  Next, I consulted Google to find out what an oven temp of 160 C. translated to in Fahrenheit (about 325 degrees), and how much was 300 grams of grated beets.  After getting conflicting information on the last query, I just went with a cup and a half.


Ready to go in the oven - the batter is sort of pink.
After baking - it looks like chocolate cake!
Before I go any further, I have to tell you that you don't taste beets in this recipe.  This is about to be reaffirmed, I suspect, momentarily.  Norm just got home from work and is loading a piece of what simply looks like yummy chocolate cake on a plate as I type this.  And he loathes beets.  I'm about to ask him what he thinks of the cake...

One moment please...I want him to finish the whole piece.

"It's a really good cake."

YES!!!

"Why, does it have beets in it?"

Yes.  Yes, it does.  (He seems unfazed by this admission.)

Now, I bet the only reason he asked that is because I've had the new beet cake recipe printed out and sitting next to the computer for a few days and he probably noticed it.  I made sure I did all the dishes and cleaned the kitchen of any other evidence before he got home.

"Well, you can't taste them.  Maybe it's a little sweeter," he added.

I'm calling that a success.  

Dad, if you're reading this, I will save you some cake.  Thanks for sharing your garden bounty.  And thanks again to Julie, who enjoys baking and quilting and gardening, among other things.  Her beautiful blog is drool worthy on many levels.

Below is my gluten-free version of the recipe linked above.  I made other modifications as well, and I want to remember what I did.  I'll be making this again!


Chocolate Beet Cake (gluten-free)

1/2 c. melted coconut oil (I used part ghee, about 1/4 c.)
1/2 c. unsweetened applesauce
2/3 c. sugar
2 large eggs
1-1/2 c. beets, peeled and finely grated
1/3 c. white rice flour
1/3 c. sorghum flour
1/3 c. almond meal flour
1/4 c. tapioca starch flour
3/4 t. xanthan gum
1/4 c. cocoa
1 t. baking powder
1 t. baking soda
1-1/2 t. cinnamon

Topping:
1/4 c. chocolate chips
1/4 c. ground walnuts

Preheat oven to 325 F.  Grease a 9 x 9 square baking pan.

In a small bowl, mix together white rice flour, sorghum flour, almond meal, tapioca flour, xanthan gum, cocoa, baking powder, baking soda, and cinnamon.

In a mixing bowl, beat together oil, sugar, applesauce, and eggs.  Stir in grated beets and flour mixture, and mix until well combined.

Spoon into prepared pan.  Sprinkle with chocolate chips and ground walnuts.  Bake for 30 to 35 minutes or until toothpick comes out clean but moist.  Cool before cutting.

Monday, July 8, 2013

Things, Continued

Thanks to everyone who chimed in with an opinion as to the background in the previous post.  I went with D and have it appliqued on now.

It feels like it needs something else, but I can't put my finger on what.  I'll let it sit for a while to chill.  Maybe an idea will percolate.

I also liked C, the pool-like aqua background, but Norm was not a big fan.  Something else I hadn't initially considered was that it will hang on a sage green wall, so the color clash may have been a bit much with the aqua.

* * * * *
Picking up on our trip to the recreated Ojibwe village at Waswagoning, which we toured while on vacation last week.

I immediately thought of a quilt block when I saw this colorful shield at the entrance.  There was another one over the main building/gift shop in a different style, but I forgot to get a picture of that one or ask the story behind them.

Our tour guide called in a young man whose job was to demonstrate Native American fire starting using a traditional method.  He used a bow around which a pointed dowel or drill-like piece of wood is wrapped in a cord.  He held a stone in his left hand at the top of the drill and moved the bow back and forth with his right.  The reciprocating motion by drawing the bow back and forth causes friction and ultimately hot embers on the lower end of the drill, which then ignite the tinder around and beneath it.  

Traditional tinder was frayed cedar, but they have since switched to using jute (from the local hardware store), both for demonstrations and also in the fire-starting kits they sell.

In the time it took me to formulate that explanation and peck it out on the keyboard, this guy could have started three fires.  He was a pro!

The Ojibwe of Lac du Flambeau traditionally spearfished by torchlight from canoes.  Ojibwe spearfishing continues to the present day and has been the subject of controversy over treaty rights.

Ojibwe fishing spear
Lac du Flambeau translates to "Lake of the Torches" (also the name of the casino on the rez).

Here is a traditional type birch bark canoe.

I really enjoyed seeing the workmanship of the canoe.  Our tour guide told us what Native people used to sew with as lashing—pine roots!  You know, those things you trip over when you walk in the woods.  Apparently, they made good, strong "thread" for heavy-duty jobs of this sort.

Pine roots - used for sewing
The torch is made of birch bark and pitch.

It was interesting to learn how canoes were stored during the winter.  The tour leader asked if we had any guesses.  I guessed in the trees - wrong answer.  They were pulled out to the middle of the lake, loaded with stones, and sunk!  There they would remain, safe from being stolen and preserved below the ice in the depths of the frigid waters for months on end.

Fish trap
We heard about wild rice harvesting by the Ojibwe, and how young children were recruited to "dance" on the grains to break down the outer husks.  This was done inside a special pit while the elders told stories (because after about an hour, kids being kids, it wasn't so much fun anymore).  Then the rice was tossed in the air over a blanket or large piece of leather to separate the chaff.

The tour guide shared a wild rice recipe "so easy you don't even have to write it down."  Maybe not, but I heard someone repeating it into their smartphone behind me.  I am making a version of it in the oven as I type this post and I can smell it cooking.  I'll give you the details later, if it turns out (just checked it and it's got a ways to go).

These war clubs look like they could do some damage, if necessary.  

There were feathers on the end of one of the clubs (cut off in my pic).  The guide told us how they would sneak into the camp of another tribe at night, brush the feathers across the cheek of a sleeping person, and take something belonging to them.  If no one woke to the feather's touch, and on discovering the next day that something had been stolen, the tribe would lose face.  Apparently, gaining it back meant doing the same to the first tribe.  Ah, the games people play.

Spears on side of wigwam
We heard about wigwam building and saw various summer and winter camp re-creations.  Can you imagine cooking in a winter kitchen like this?

Winter cooking area
Did you know the toboggan was the traditional form of transport for northern Native people?  Same thing with the snowshoe, invented by North American indigenous people.

Underground cache for food storage
Here's your below-frost-level refrigerator, called a winter cache.

These winter wigwams could be heated with a small fire to a toasty 68-70 degrees.  I didn't ask whether the bear skin was used for decoration or insulation.  Maybe both.

In the spring, maple sap was boiled down into lumps of maple sugar and these were saved for the next winter.  When stored food was scarce or hunting was poor, it was often this supply of maple sugar that got the tribe through the end of a tough winter.  It takes 40 gallons of sap to make 1 gallon of maple syrup, so you can imagine that's a whole lot of maple trees to be tapped to make maple sugar.

If you ever get to northern Wisconsin, I highly recommend a visit to Waswagoning.  It was a fascinating glimpse into traditional Ojibwe culture.

So that's a little taste of the tour.  How about the wild rice dish?  

It's later now and I've eaten it for supper and it was very good.  It took quite a while for the rice to get tender in the oven, so if I make it again, I will probably cook it on top of the stove and add cooked chicken toward the end of the process.  

Here's what I did.

Ingredients:
1 cup wild rice
2 cups chicken broth + 1 cup water (total 3 cups liquid), heated to boiling
1/2 cup dried cranberries (or you could use 1 cup of fresh cranberries)
2 boneless chicken breasts, cut into bite-sized pieces
2 ribs of celery, chopped
1/2 sweet pepper, chopped
chopped fresh chives
1-2 Tablespoons butter (or butter substitute)

Preheat oven to 350 degrees.  Layer everything in a large casserole dish and pour the hot chicken broth/water over the top.  Cover and bake until rice is tender and most of the liquid is absorbed.  This took 1-1/2 hours for me.  Check it after about an hour and give it a stir.  If the rice isn't fully cooked yet, return it to the oven for a half hour or so.

(Write a long blog post, edit photos, talk on the phone...)

Then enjoy!

Friday, April 26, 2013

Favorite Things Friday, the Finale

Eek, it's Friday night!  I say that not that it's a bad thing, but because I've been meaning to do a Favourite Things Friday post, probably the last Favourite Things Friday post ever, because our fabulous hostess Shay at Quilting in My Pajamas has declared it to be so, in that she's been doing the Friday linky for two and a half years and has decided it's time to put her baby to bed, which I totally understand, and this is hands down the longest run-on sentence in the history of this blog, I guarantee!

Whew.

So while Norm is out gathering necessities for the weekend, i.e. good coffee and chocolate at our neighborhood Walgreens, I am going to try and do a post real quick.  Because when he gets back, we've got some Netflixin' to do.  No, that is not code for something, we're going to watch a movie!

So I had some things in the freezer—namely, last year's rhubarb—to do something with before it's rhubarb time all over again in six weeks or so (emphasis on the "so").

I love rhubarb, but because you need to sweeten it to make it palatable, and I have been trying to avoid sugar (and kinda failing at it lately), well, let's just say the rhubarb has been pretty safe in the freezer for almost a year.


But then last weekend a friend (cleaning out his own freezer, I suspect), gave me several packages of strawberries from his garden last year.  And raspberries.


I also had a frozen gluten-free pie crust in there left over from holiday baking.  Pretty much all the main ingredients for a rhubarb-strawberry pie.  Look out sugar, here we come!


But you know what?  Turns out you don't really need all that much sugar for this pie.  I admit I like a tart pie, and my taste buds have adapted to eating less sweets, so factor that in.  Most recipes call for about 1-1/2 cups of sugar in a pie of this sort, but I cut it down to 1/3 cup...and then added in another tablespoon or so as insurance an afterthought.  So essentially I used a scant 1/2 cup sugar total, and it was just fine.  So fine and so yummy that I am declaring it my favorite thing!

Rhubarb-Strawberry Pie 
(Gluten-Free, Dairy-Free, Lower Sugar)

2-1/2 cups chopped rhubarb (½-inch pieces)
2-1/2 cups strawberries (sliced into halves or quarters is probably best;mine were whole frozen so I didn't bother)
Zest of half a lemon, freshly grated (I pare off a thin part of the lemon rind and chop it very fine)
½ t. cinnamon
3 T. arrowroot and/or tapioca starch flour
1/3 cup + 2 T. sugar (or around a scant ½ cup)

Mix everything together thoroughly in a bowl and spoon mixture into prepared crust* in a pie plate.  (Fits nicely in a regular/shallow Pyrex pie plate).  I didn’t want a top crust, but if you want one, feel free to pop another crust on top and crimp the edges/cut slits.  Bake at 400 degrees for 20 minutes, then decrease to 375 for 40-50 minutes, or until it's bubbling nicely and the rhubarb is soft. You may need to cover the edge of the crust with foil if it’s browning too much. Cool at least one hour before serving (or longer, if you can stand it).  Enjoy!

*I use this gluten-free pie crust recipe but substitute either cold ghee or coconut oil for the butter.  Ghee is clarified butter, but the casein and lactose are removed in making it, which works for casein-intolerant folks like me.