
The next two quilts I finished for my cousin were a smaller version of my Hole In The Barn Door quilt from last year and a smaller version of the Chain Linked quilt. (Click those links if you want to see the full-size versions.)
She had seen those two quilts on my Facebook page when they were for sale in December as part of my "make room in the quilt closet" efforts. As with the Ship Shape quilt mentioned in the previous post, the overall designs of these quilts appealed to her, so she asked me to make something like them, but smaller, for her newest grandchildren.
Here is the Hole in the Barn Door quilt that I made for her. It measured about 43 x 55 inches before quilting. I forgot to measure it again after quilting.

This is where I will give the block construction details, because, yes, you may be interested, but also because otherwise I will forget. I've often had to refer back to the blog for the specifics on how I did something, and I will probably keep having to do that. I'm sure keeping a written quilt journal would be a helpful and handy reference, but I can't seem to be bothered to be that organized on paper. I tend to scribble things down on whatever is handy and then toss it aside, or worse, jam it into a "safe place." Unfortunately, experience indicates that after a couple of months, those "safe places" are indeed quite safe from even me!
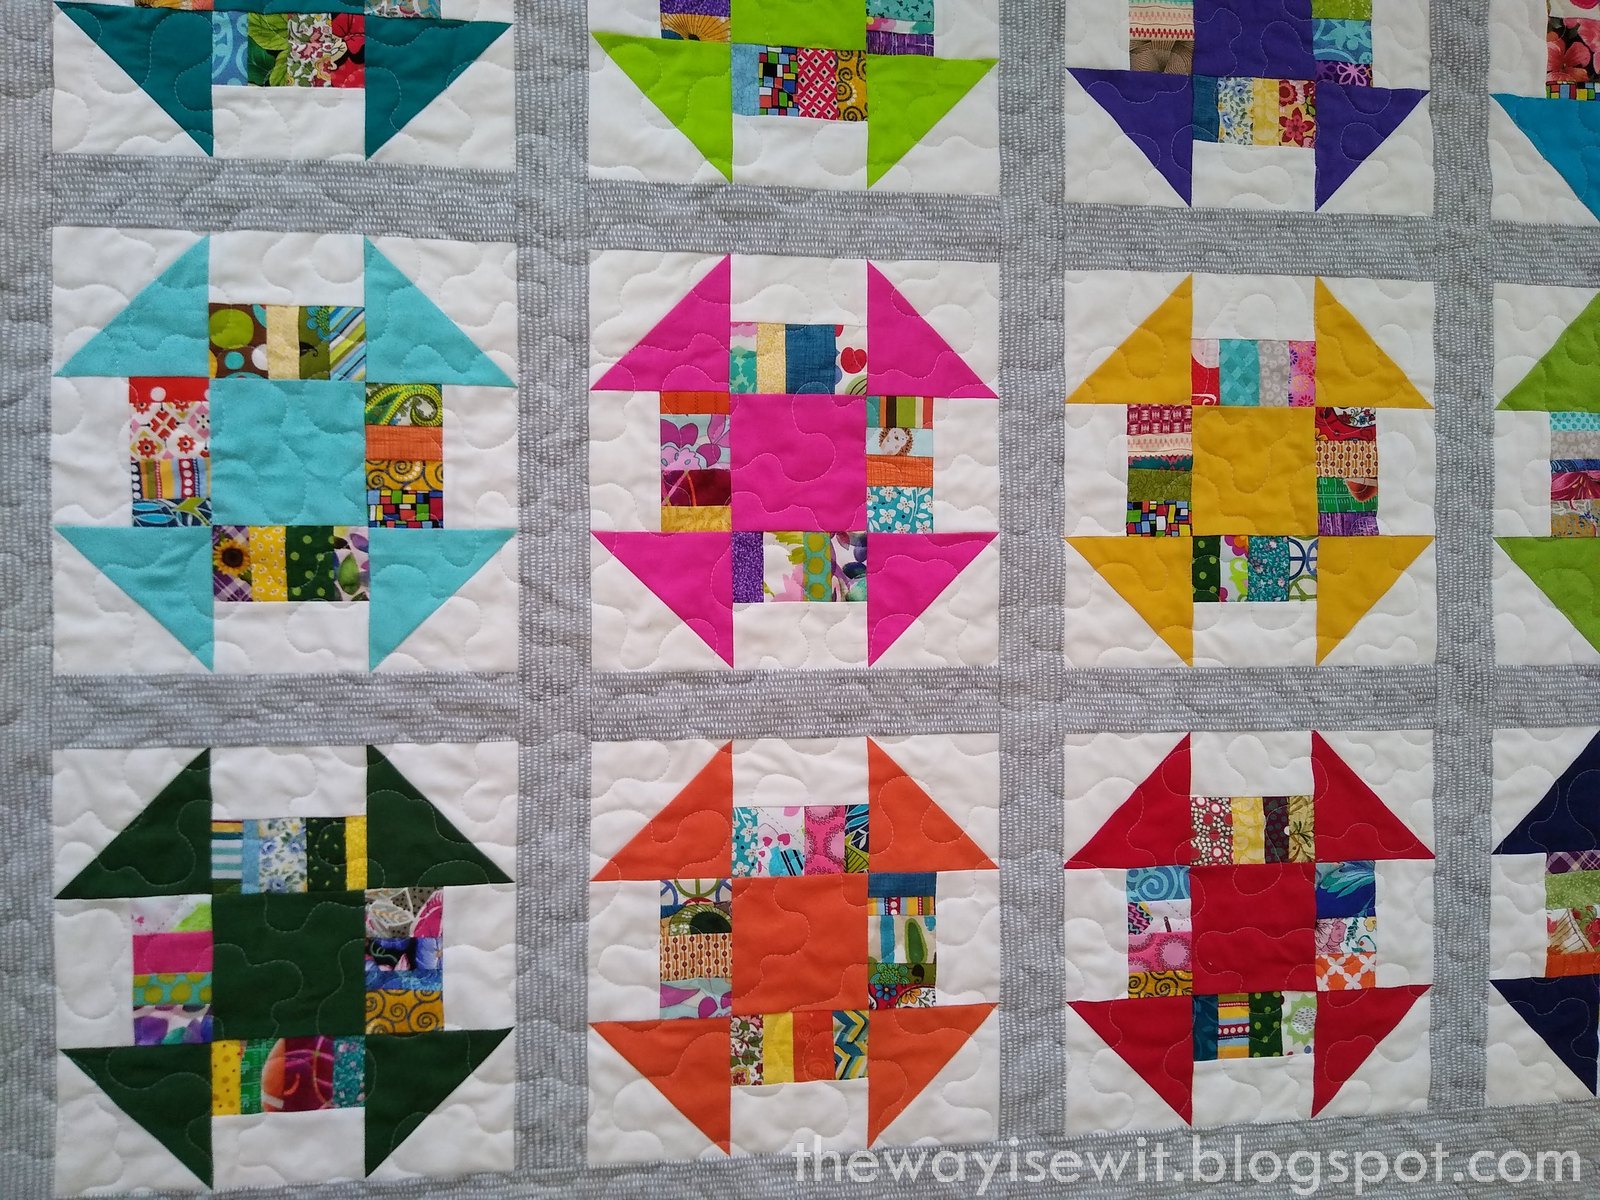
So here are the details. For each 10-1/2-inch block, cut:
- Two 4.5-inch squares of solid color fabric (for HSTs) - trim HSTs to 4 inches*
- Two 4.5-inch squares of background (i.e. white) fabric (for HSTs) - trim HSTs to 4 inches*
- One 4-inch square of solid fabric (for center)
- Four 2.25 x 4-inch rectangles from background (white) fabric
- Four 2.25 x 4-inch string-pieced rectangles
*OR cut these squares 4-3/8" if you are careful about your scant 1/4-inch seam. I actually ended up doing that, and there was no trimming necessary to make a 4-inch HST.

I just love the brightness of this quilt. It has such a happy vibe!
Next, here is the smaller version of Chain Linked, which came in around 44 x 54 inches before quilting.

I followed the Chain Linked quilt pattern cutting instructions but decreased the number of blocks required, laying it out 5 blocks across by 7 down (20 tan bordered and 12 white bordered in my quilt).

Funny thing, as I finished sewing the last seam of this quilt top, I won the game of bobbin chicken! That three-inch piece of thread was all that was left in the bobbin. Because my Juki bobbin is hidden from view, I didn't even know I was playing, but I'm happy I won!

(Like my mug? My brother can make one for you HERE!)
These quilts, along with the smaller version of Ship Shape, were mailed off to my cousin earlier this month. She called me after she got them and said she absolutely loved them. That's always so nice to hear!

To be honest, I wasn't sure about this quilt at first. I had a fat quarter bundle of various graphic prints in the stash that were calling me, so once I landed on a combination of solids that would tie everything together reasonably well, I just started cutting.
By the time the quilt was done, it had totally won me over. Sometimes it's good to get out of your own way and just do the thing!
Linking to: Finished or Not Friday! at Alycia Quilts and Can I Get a Whoop-Whoop?
~Paulette


