Showing posts with label A Stitch in Time 2012 Finishes. Show all posts

Sunday, December 30, 2012

Happy Review Year 2012

The year 2012 in review, collage style (click to enlarge).


Four of these are UFOs to be quilted in the New Year, but all in all, considering what else occurred to divert my attention, I'm happy with this picture!

Saturday, December 15, 2012

Hammering Out Another Wheel

I finished another wall hanging yesterday.  This Carpenter's Wheel is going to a friend and fellow quilter with a birthday in between the holidays.

I started out intending to use Christmas fabrics, similar to the one I made for my sister recently (which she has hanging in her kitchen now).  However, I just wasn't quite feeling it this time, so I looked around at what else the stash might have to offer.

My eye quickly settled on the beautiful purple print this same friend had gifted me last Christmas.  I pulled a batik scrap and then another light blue/pink/white batik for the third fabric.

Here is the free pattern I used for the block.  I cut the squares for the HST pieces at 3-7/8 inches and the solid squares at 3-1/2 inches.  The project finishes at about 24 inches square.

The backing was a thrift store find earlier in the year.  Love those colorful sun/moon faces!  Also, I wish you could feel this soft fabric and its wonderful quilted texture under your fingertips.  Dreamy.

It is quilted in a Sulky variegated thread with just the right amount of shimmer.

I'll be mailing this out soon, so it will arrive in time, of course, but also because the longer I look at it, the more I might want to keep it!  ;)  Fortunately, I have some leftovers that will make a fun mini or mug rug.


Linking up with:

December Finishes

Thanks for visiting!

Friday, December 7, 2012

Red, Red Wool

Earlier in the year, I bought a red wool jacket at Goodwill for the express purpose of cutting it apart. 

I did that recently.

The idea was to try to felt the wool.  I envisioned making all sorts of cool Christmas things, like gift tags or ornaments or little stuffies resembling Santas and stockings and poinsettias and cardinals and such.  As you do, when you think the entire year stretches before you like an empty road and you have all the time in the world.

But all of a sudden, here it is December and there is that red wool.  I should do something with it.

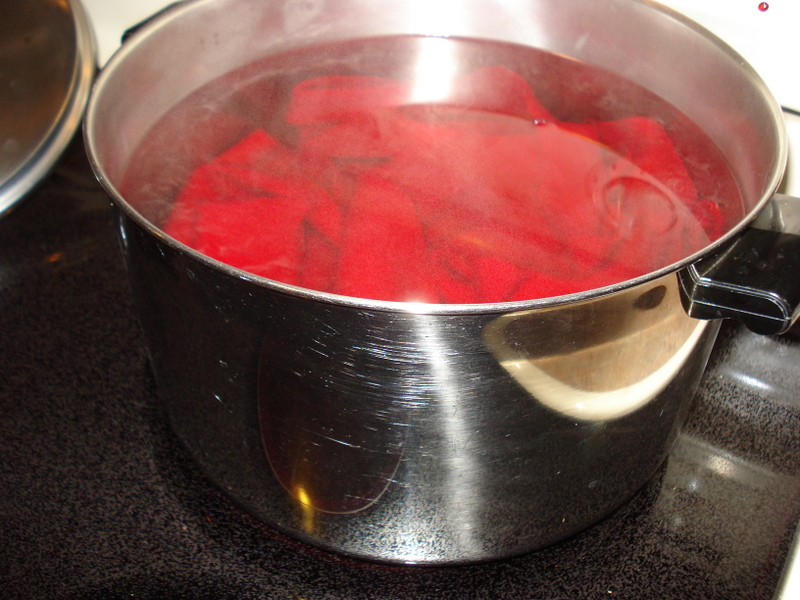
So first I washed it in the washer on hot setting and dried it in the dryer.  But it wasn't quite felt-y enough afterwards, so I decided to boil it on the stove.

Simmer is probably a better word.  About 20 minutes later, I drained the boiling water off and gave the pieces a brief soak in cold water so they could be handled.  Rolled them up in a towel to draw off the excess moisture and then hung them to dry.

Felt-y goodness!

This morning, I drew a little ornament on paper and then traced and cut it out from one of the pieces of wool.  I cut out the middle circle and replaced the felt with part of one charm square of Blitzen, which I Elmer's Glued in place from underneath and pressed with a dry iron to set dry.

I glued another little piece of fabric over the top.  Then I set the whole thing on another piece of red felted wool which was bigger all the way around than the top piece (basically a square).

I threaded my machine with some sparkly metallic Sulky thread (which my machine did not like at all), and I quilted through all the layers, first in a straight line star pattern, and then around the outside edges and finally around the inner circle.  Then I trimmed it, following the shape of the upper piece as a guide.

It was an afterthought to add the hanging loop, and I really should have sandwiched in between the layers as I was quilting it together, but hindsight is 20/20.  My machine rewarded me by jamming with the very last stitch, and because I thought I could sew past the jam (ho-ho-ho), it proved just who was boss and broke the needle with a flourish, as if to say "FINITO!"

Oh, the drama.

I added a little red button in the center as a final step.

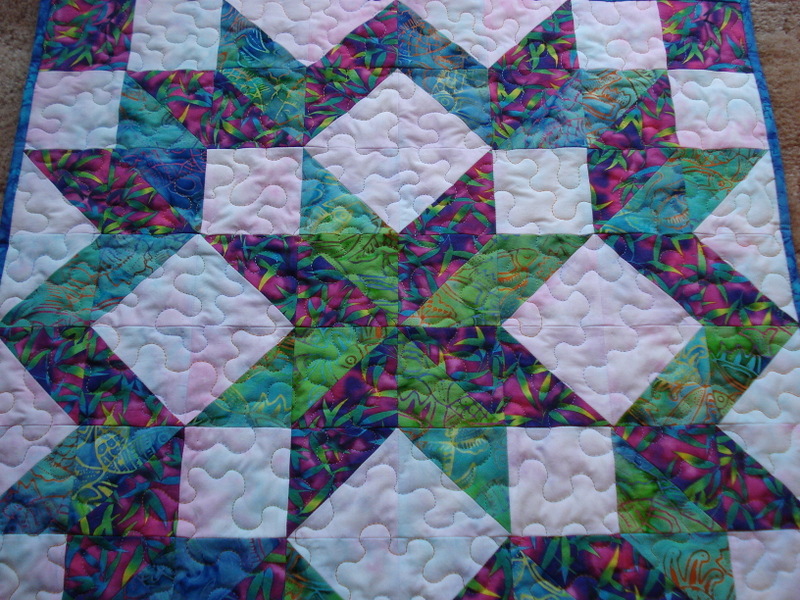
This may or may not be the only red felted wool item I produce this season, but better than nothing.  And it's kind of cute, if I do say so!

Update:  I made another one last night. This one went together faster.


December Finishes


Dreaming in Patchwork

Tuesday, November 20, 2012

A Busy Wheel

My sister admired the Carpenter's Wheel wall hanging I made around the holidays last year, so I put one together for her last weekend.  She likes jewel tones, and I had a couple of older Christmas fabrics left over from Mom's stash that I thought would be nice to use.
Instead of a plain lighter background, I used a text print with seasonal greetings that a friend gave me.  I'm not sure if it works or just makes the whole thing too busy.  It's a horse apiece, in my opinion.
But if Sis doesn't like it, I'll make her another one, and this will either become a gift or I'll hang it in the hallway.
The backing is a thrift store fabric find from earlier in the year.  I love that shade of vintage-y green.  All the Christmas fabrics have a metallic bit to them.
Although I haven't (and can't yet) show pictures of everything I've been working on, I am happy to have knocked out six wall hangings/minis/table runners, a half dozen pillowcases, and a few pairs of jammy pants over the past several weeks, and all that while the sewing room has been in a state of flux.  I feel pretty good about that!

One more thing to leave the sewing space last weekend was the 20-year-old TV.  It took both of us to haul the old behemoth up the stairs and finagle it into the back seat of the car because it wouldn't fit in the trunk.  We drove it immediately to Goodwill, where a stocky 20-something young man at the drop-off door came out to greet us.  After watching Norm labor to get it out of the car, he took it from him and then in one fluid maneuver rolled the whole set up onto one shoulder and walked into the building with it, saying, "Oh, it's not that heavy."  Norm and I walked in behind him, eyeballing each other and thinking the same thing: Show-off.

Monday, November 12, 2012

Serendipity Table Runner Tutorial

Did you ever do an internet search for quilt ideas and be led back to your own blog?  Well, I can check that one off my list now.

I was looking to do something with a beautiful Moda Swiss Holiday charm pack I'd won in a giveaway earlier this year.  I Googled charm pack quilted table runner ideas, and after following this link and that, I ended up on somebody's Pinterest page where I saw that this nice person had pinned my own Scrap Challenge Block.

This block is pinned in real life to my design board just to the right of my sewing table, but you know how it is when you look at something so often you don't even really see it anymore?  Or how you can miss the forest for the trees, or, in my case, the trees for the forest?  Yeah, I'm kinda good at that.  I have had people I know wave at me from five feet away, but I didn't see them because I was looking over their heads to a vantage point 20 feet beyond.  I did that on election day to my neighbor.  I've done it to my niece at an adjoining restaurant table.  And try explaining that you aren't purposely snubbing someone, just being your usual preoccupied/absentminded self.  So embarrassing.

At any rate, it was nice to be reminded of that block in however roundabout a way.  Let's call it serendipity.  No really, let's call this table runner Serendipity.  (My first idea was to call it Triple X, but on thinking of the kind of traffic that might generate, it seemed appropriate to reconsider.)

I started by taking the charm pack apart and separating the squares by pattern and then by light and dark, large scale print and small scale, etc.  I determined that I could make a runner three blocks across using the Scrap Challenge Block as the basis.

Here is how it went together (click on photos to enlarge).

Each block will have a grouping of 2 light fabric squares and 2 darker squares.  I picked the large scale prints for my darker ones.  I'm calling these the background squares.

In addition, each block will use 4 other squares for the corners.  I used 2 almost "solid" squares and 2 small scale prints for these corner pieces.

You will make 3 X-shaped blocks for the table runner.  In the below photo, you can see the groupings I used for each block, arranged in 3 columns from left to right.  (Note that there are 2 identical charm squares stacked one on top of the other, which you can't really tell from the picture.  Just remember to use 2 of every fabric shown.)

Next, cut your background squares in half on the diagonal:

Then take your corner squares and cut a 1.5 inch strip off the side of each.  From the section that's left, cut a 3.5-inch square.  Further trim the 1.5-inch strips you initially cut down to 1.25 inches and set these aside.  These 1.25-inch strips can be used when you assemble the strip sets later on.

Take the 3.5-inch squares you just cut, and cut them in half on the diagonal.

This is what you should have so far:

You will also have a bunch of uncut charm squares left over.  Select about a dozen of these.

You will then cut your selected charm squares into four 1.25-inch strips.

Combine all your 1.25-inch strips, in a pile.  Well, really there's no law that says you have to make a pile, but I am a piler so that part makes me happy.

Now you can start reassembling them into strip sets of 4 strips each.  Mix it up, vary your strips, and have fun with it.

You are then going to sew your 4-strip sets back together to make 12 strippy sections for your blocks.  (You will have some strips left over, which you can use for something else, like a mini or get creative with your backing perhaps—or toss 'em; you won't hurt my feelings.)

At this point, I laid out all the pieces into 3 blocks, just to make sure I had it fixed in my mind how to sew these together.  I fiddled with the layout a little bit, swapping strip sets here and there until I was happy with the overall look of each block.

Block 1
Block 2
Block 3

Now it's time to sew the units together.  By unit, I mean one strip set, two background triangles, and two corner triangles:


First, take a strip set and sew the larger background triangle pieces along the long sides of the strip set.  Your strip set and triangle pieces won't match.  In fact, your background triangles will seem way too big.  They are.

Here's a tip:  The ends will overlap the strip set by one inch on the top and bottom edges.  I lay it on my cutting mat so I can equalize the overlap (centering the triangle placement) and pin at top and bottom.  Sew along the long edges, being careful not to stretch the bias of the triangle piece.  Just let it flow under the presser foot, nice and easy.

Press these triangles out and then trim the overhang even with the strip set.  I have rotated the block in this photo for trimming, but don't let that throw you.

Now take your corner triangles and sew them onto the remaining edges.  This time, your triangle pieces will fit better.  No need to stretch or pull to make anything match, just center the point of the triangle using the center of the strip set as a guide.  Easy peasy.

Press the corner triangles out.  And what's this?  It looks wonky, oh dear!  Never fear, we're going to whack it down to 5-7/8 inches square.  It will be okay.

Yeah, that's a weird and seemingly fiddly number, but your corner points will match really nicely this way, assuming you use a scant 1/4-inch seam allowance.  Just pay attention, especially with the first edge you trim off, that you have left a 1/4-inch seam allowance at the corner pieces.  See the asterisks on the photo below (which I magically cropped in my photo editor because I forgot to take a picture of the actual trimmed block.  I think you get the idea.)

Once all your units are sewn together and trimmed, you can then sew each of your three blocks together, then join the blocks into your table runner.

Ain't she purdy?

Quilted and bound, it measures about 32 x 11.25 inches.

If you have any questions or if something isn't clear, let me know.  And if you make one, I would love to see it!


NewFO2012

November Finishes

Friday, November 2, 2012

Declutter Report No. 3

Another trunk load went to Goodwill this past week.  Thankfully, they accept computers for recycling.

Before donating the PC, I removed the hard drive, which I'll dispose of myself after taking a hammer to it.  I'm saving that task for PMS week.  ;)

Tomorrow, a friend is coming to take the futon off my hands.  Yay!  I hope she isn't revolted by the cobwebs and whatnot we'll find underneath when we move it.  I am actually looking forward to doing a thorough vacuuming once it's gone.

"Out the Door October" is officially over, since we've flipped the calendar page, but the decluttering and reorganization will continue.  I'll spare you any more photos of my rubbish, however.  You're welcome.

I'm curious:  How do you organize your fabric?  Do you have a folding system?  Stack it on shelves?  Organize it by color or fabric line?  Put it in totes or boxes?  Stash it in a closet (or under the bed)?

I ask because I just don't know where to go with it all.  I need a system, but not sure what kind.  I am an out-of-sight / out-of-mind kind of person, i.e, if I put it away, I tend to forget about it.  I am more a "piler" than a "filer," so right now my fabric is stacked wherever there is a flat surface, and that looks bad.  But I feel that I need to see it to get the creativity flowing, on the one hand, and yet being surrounded by it at all times can be overwhelming, on the other.

Please share what works for you.  If you've done a blog post of your organized space or system, leave a link.  If you feel anything but organized, feel free to share that too.  If you too are a piler, have you found a way to have your piles and file them too?

In other news, I posted photos on Flickr of a couple of recent finishes.  These will be Christmas presents, so I am "hiding" them over there, where the recipients have promised not to peek.  The rest of you can see them by clicking HERE and HERE.  Have a good weekend!