Monday, April 17, 2023

Mistakes Were Made

Nobody's perfect.  As quilters, we can tolerate certain imperfections.  Sometimes they're what makes a quilt uniquely beautiful.


However, this sampler quilt that I've been working on has had me shaking my head on more than one occasion over the pattern directions.  That's it above on the design wall earlier today, partially sewn together, before I fixed the big star block on the lower right.

Granted it was a freebie pattern I found online and I appreciate that, but I'm also glad to have the wherewithal to notice the boo-boos and fix them.  Someone else may have given up in frustration.


It was possible I had goofed in constructing the half-rectangular units such that the points would be blunted once the top was sewn together (see red circled areas below).  In fact, I considered leaving it as is.  So what if the points of the stars didn't end where they should have?  Would the recipient notice and/or care?  Maybe, maybe not. 

But since I had leftover fabric and the willingness to investigate the error, I went back to the drawing board.  I remade a test half-rectangle unit per the cutting instructions and trimmed it to size per the instructions.  The result was... exactly the same.  Ugh.

It seemed to me I needed to cut the triangular pieces longer, but by how much?  I continued to make two more test samples before finally hitting upon the dimensions that seemed to work.  Turns out I needed to add 1.5 inches to the length.  That's not an insignificant "fudge factor."

My recalculations may not be perfect, but it's definitely looking better.  I may lose a tiny bit of the point in the seam allowance, but I can accept that.


Cutting directions were wrong for the pinwheel block, too.  It had me cutting fabric squares at 4.5 inches to make HSTs, but that was, in fact, the trimmed HST size.  I questioned it when I cut the squares, but I sewed it up per the instructions anyway...only to have to recut the pieces and do it again correctly.  Sometimes I can work against my better judgment just to prove a point, ha!

There were other pattern errors in the dimensions of finished blocks, and more.  You get the idea.

But these blocks turned out fine.  I used a light blue thrifted shirt fabric in the lower block.  The other large plaid in the quilt is yardage, not a shirt.


These wavy blocks are okay.  If I were to do them over (which I'm not), I'd pay closer attention to trimming them.  Hopefully, the minor jags will disappear with the quilting.


Anyway, I'm on track to finish the top after a few more minutes with the seam ripper. Yahoo! 

Linking to:  Hands2Help Comfort Quilt Check-In and Design Wall Monday

~Paulette


Wednesday, April 5, 2023

Cutting, Committing, and Cuffs

Sometimes what I do in the sewing room seems hardly worth mentioning.  Cleaning up, refolding fabric, making frankenbatting...those are the kinds of things I've been up to.  Necessary, but mostly background stuff.  Eventually, it leads somewhere.  

I picked up a few shirts at the thrift stores last week.  It used to be (and not long ago) that I could buy a decent shirt for $3.99, but now they're almost double that in price and then some if it's a name they associate with a premium brand, which seems weird to me because brand name doesn't always correlate to quality.  Wow, I sound like such an old person.  

Anyway, when I shop for shirts now, I take note of the tag colors that are 50% off and hone in on those.  I came home with a good armful of them, and a few other items.

(Thrifted zippers for bag making and some thread.)

(I think this thrifted shirt and striped fabric will become a bag.)

Over the next few days, I cut up shirts.  There ended up being a nice pile to add to the stash.


I usually toss the cuffs and collars, but I played around with them first.  The thought occurred to me that perhaps I could join the cuffs together for a table runner.  


After removing the buttons and giving them a good pressing, I butted together the cut ends and zigzagged them, then joined them all in a row.  At that point, I couldn't tell if the idea was "cool" or "crap."


Should I trim them off evenly and use the button plackets as an edging and finish it that way?  I mulled it over for a few hours and then decided to toss it in the orphan box to marinate and move on.  But as I started to do that, I passed the bookshelf in the sewing room and decided to try the piece out on top of it in place of the vintage fruit-themed dresser scarf that was there.


Well, well, well...  I liked it there!  A humble little runner under the old toy tractor my dad used to have for his grandkids to play with.  It'll do just fine, as is.

Now what's next? I pondered.  A few ideas were floating around in my head, but I needed to focus.  One way to help me do that is to make a commitment, so I went and signed up for the Hands2Help Comfort Quilt Challenge.  

With that in mind, I started cutting out a sampler-type quilt from a free pattern I downloaded from JOANN and bought fabric for a few months back.  I really like those big wavy curves.  It's something a little different for a sampler.


I originally thought it would be a baby quilt, but it's more like lap quilt size. So I'm going to make it up for H2H.  At least, that's my thought at the moment.

Here's the first block on the design wall.  Turns out the fabric wasn't as bright blue as the pattern seemed to indicate, but that's okay.  It is a little brighter looking than the photo in real life, but more a muted navy than medium blue in any case.


What are you working on?

~Paulette

Monday, April 3, 2023

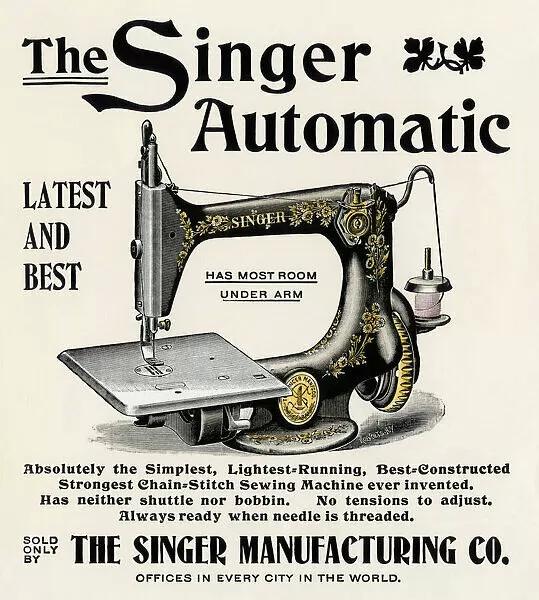
Sewing Machine Fun Facts

I happened across this YouTube video on the history of the sewing machine that I thought was pretty funny.  Also informative, as in I had no idea!  


You'd think it would have been pretty straightforward:  Some bright star invents the beloved machine, which is met all around with, "Hey, what a great idea!"; the gizmos sell like hotcakes and the rest is, well, history.  Right?  

Not exactly!

The real story is full of twists and turns, litigants and lawyers, murky maneuvers and mass marketing. 

Abby Cox does a brilliant job in the video.  It's always a plus when you can laugh while you learn!

* * * * *

Several months ago, I was sorting through and organizing some papers for genealogical purposes when I came across this insurance policy from 1892.


Do I really need to keep this?
I wondered, as my eye scanned down the page.  My great-great-grandfather had insured his farmstead, itemizing its contents on the front page.


Do you see what I see?  Listed among the buildings and livestock was another valuable piece of equipment:  A sewing machine valued at $25.00 (about $800.00 in today's dollars).

Worth half as much as the barn and less than the onions*, but still an important item to enumerate and insure.  I thought that was pretty cool!  And yes, I do need to keep this!

*He was a fruit and vegetable farmer who marketed his produce, so I assume the onions on hand in January were his stock to be planted for the upcoming season.

~Paulette

Friday, March 17, 2023

Two Small Quilts Finished

Last week I finished two small quilts that a friend had requested.  Along with the Wonky Log Cabin quilt, she wanted two more of a similar size so each of her grandchildren could have a picnic quilt.  Isn’t that a neat idea?

She left it up to me, whatever kind of scrap quilt I wanted to make.  Size-wise, I was aiming for around 48 inches square.


The idea for this first one came to me one evening as I finished a Sudoku puzzle—honestly, the first one I had ever finished.


I had made two Sudoku quilts a dozen or so years ago.  At that time, Sarah had shared her Sudoku pattern with me, so I didn’t have to solve a puzzle to know how to lay it out (thankfully).  I had gifted one of the quilts and used the other as a throw for a while, but now that one was safely stacked deep in the quilt closet.  Out of sight, out of mind.

But one night a few weeks ago, I grabbed a Sudoku puzzle book another friend had given me last year.  I had never done an entire Sudoku puzzle before; truth be told, it never seemed to click with me and felt like an exercise in frustration (at least my attempts at the ones printed in the newspaper).  That night, however, I needed something to do before bed that would make my brain tired and give me something to focus on besides the fretful thoughts in my head.  So I started on the first page of the book, presumably the easiest of the easy.  An hour later, I had solved my first puzzle—and remembered the Sudoku quilts.

The next morning, with that puzzle as a reference, I pulled nine fabrics from the stash and assigned each one a number.  I cut nine 4-1/2 inch squares from each fabric and then laid out this quilt.


I used a bright green Grunge fabric for the sashing between blocks, cut 2 inches, finished it with a light purple tone-on-tone, cut 4-1/4 inches, for the border.


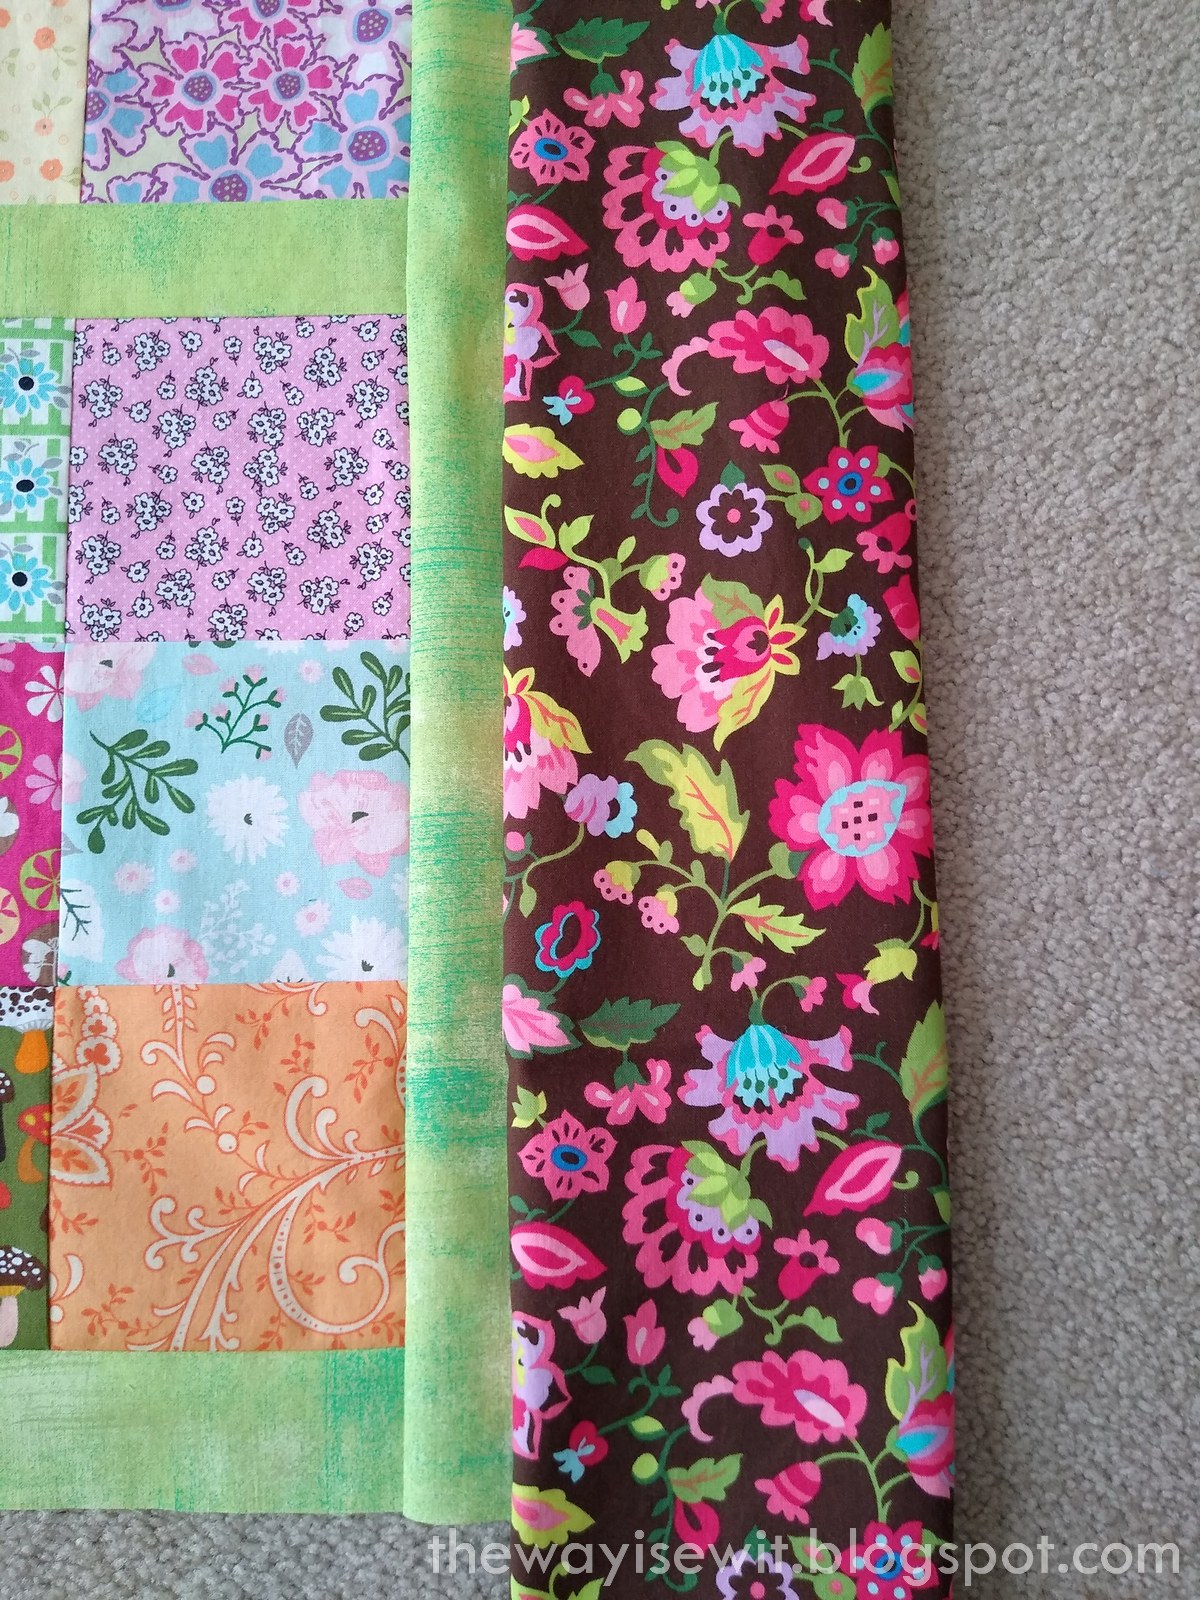
That was not the border I initially thought I’d use, which was this brown floral.  Too dark.  Cute fabric, though.  I saved it for the next quilt, as you’ll see.


After quilting, the Sudoku quilt came in around 48-1/2 inches square. Can't you just imagine a sweet little tea party happening on this quilt?


I liked that brown floral, so for the next quilt, I started pulling fabrics to pick up on the colors of the flowers in the print.  I cut those into strips and sewed them together into columns, stacked coin style.


The columns were trimmed to 6-1/2 inches wide.  The vertical sashing between columns was cut into 3-1/2 inch wide strips, with an outer border cut 4-1/4 inches wide.


A peek at the pieced backing, above.  After quilting, the stacked coins quilt measured 47 x 48-1/2 inches. I know her granddaughters are going to love these!


Then I made a cute mug rug with the leftovers.  :)


Linking to:

Can I Get a Whoop-Whoop?

Finished or Not Friday 

~Paulette

Thursday, March 16, 2023

Tips and Suggestions for the Four-Lily Block Templates

In the last post, I introduced the newly available acrylic templates for making the Four-Lily Block.  With its gently curving pieces resembling flowers in a ring, this block is a fun and interesting one to make.  It’s the basic block in the Thoroughly Modern Lily quilt, but I hope it sparks your imagination and creativity for any project you may have in mind!


You can check out the Four-Lily Block Instructions (free downloadable PDF) and peruse the original four-part blog tutorial, both available on the Tutorials tab at the top of the page.  If you’re wary of curved piecing or anxious about y-seams, the detailed step-by-step tutorial walks you through the process so you can stitch this block with confidence and ease.


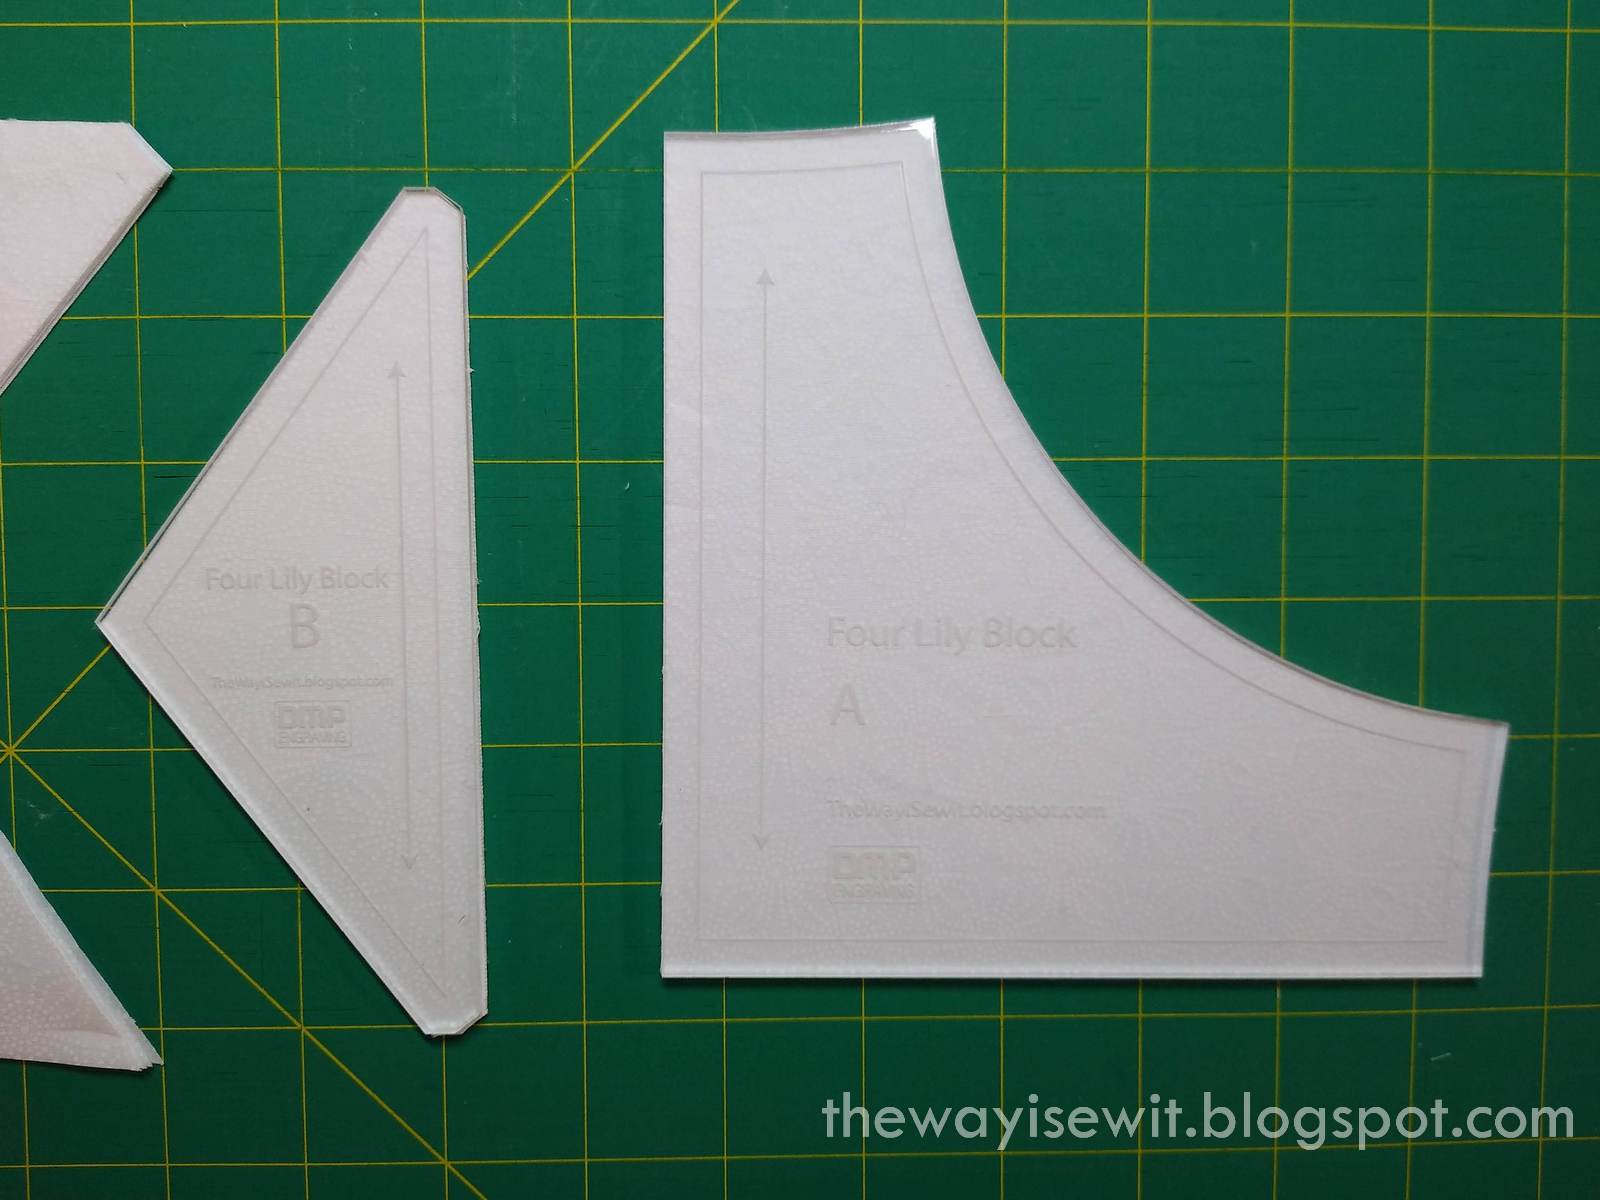
The new acrylic templates were a game changer for me, making rotary cutting possible for the uniquely shaped pieces of this block.   

Today I’m going to share some tips and suggestions that you may find helpful when using these templates.  Let's get started!

Tool Tips:

If you have a standard 45mm rotary cutter and mat, you should be good to go.  However, I found the following optional items also helpful (links here are for illustration purposes only, not affiliate links):

And no matter what cutter you're using, make sure it has a new, sharp blade!

Fabric Cutting Tips:

It’s easiest to cut your fabric into strips first, the size of which depends on the template piece you’re working with.  For example, to make one Four-Lily block, cut your fabric as follows (click on a photo to enlarge, to better see template placement):

Starting with Piece C, using the half-shaped template for rotary cutting:

  • Cut a strip of your main focus fabric 8 inches x width of fabric (WOF).

  • Place the strip right side down and fold back 3.5 inches from the selvage edge of the strip.  Place your half-shaped template for Piece C along the fold created.  Hold the template steady against the fold with one hand and start cutting from the bottom point of the template up along the right side, across the top, and then down toward the fold line. 

  • I found it helpful to use a couple of silicone grips on the underside of this template to keep it in place while cutting.

  • After cutting your first piece, fold the fabric in another 3.5 inches and repeat.  Continue to cut, fold, cut, fold, until you have all four pieces needed for the block.  It really goes pretty fast!

Piece D cutting can make use of the fabric left from cutting Piece C: 

  • Take what’s left of that 8” strip and fold it in half lengthwise.  You can then cut two Piece D at a time from this doubled strip of fabric. You’ll need to cut a total of four pieces.


  • A smaller 28mm rotary cutter makes navigating the concave part of this template easier.  If you don’t have one, just go slowly with your standard cutter.   A rotating cutting mat allows better access to all sides of this template without having to reposition your body and/or the fabric, but if you don’t have one, take your time and adjust as necessary.

Piece F can be cut from a small scrap of what’s left after cutting Piece D, since you only need one 1-7/8” square from your focus fabric.

Moving on to your second fabric and Piece E:

  • Cut a strip measuring 6.5 inches x 20 inches.  Then fold this strip in half so that it’s doubled, wrong sides together, now measuring about 6.5 x 10 inches.

  • Align the straight edge of template Piece E with the straight lower edges of the fabric.  Since you’re cutting two pieces at once, cut two of this template piece, rotating it in the opposite direction and aligning with the other straight edge for the second cut.  You’ll then have four pieces total.

Pieces A and B from background fabric: 

  • Cut a 6.5-inch x WOF strip from your background fabric (white in this example).

  • For Piece A, I folded the WOF strip so that I could cut four layers of fabric (and all 4 pieces) at once.  Again, if you have a smaller 28mm cutter, you may want to use it on the concave curve of template A.

  • Finally, using what’s left of your background strip, cut 4 of Piece B.  Once again, I folded the strip of fabric so I was cutting four layers of fabric and all four pieces needed at the same time.

That’s it!  Here are all the cut pieces laid out on the design board and ready to sew.


I hope that was clear and helpful.  If you have any questions, please feel free to leave a comment and I’ll address it.

One more thing...this fabric—I may be slightly obsessed with this Fantasy Garden Collection from Benartex!  I bought it at the local Nancy Zieman Productions store, but it’s available online from there and elsewhere.  I only got four of the prints, but it was tempting to buy a FQ bundle to have them all!


I’m thinking of making a table runner or possibly a baby quilt with four of the Four-Lily blocks.  What possibilities can you envision?  Perhaps a cute bag?  A wall hanging or table topper?  How about a scrappy throw quilt, or simply a block for your next sampler?  I’d love to hear your ideas!

~Paulette