Thursday, September 30, 2021

A Couple of Small Quilt Finishes

I finished a couple of small quilts this week.  Hooray for progress!  I also finished physical therapy for my hand.  Whoop-whoop!  

Fortunately, I didn't need the splint for the left middle finger that may be developing trigger finger.  I'm just supposed to keep an eye on it and make an appointment with the hand clinic if it gets worse.  The left pinky finger that had surgery will just take time to heal completely and the swelling may last up to a year, she said.  I went down a size in the compression sleeve, from a large to a medium, so it feels like things are going in the right direction.

Anyway, quilts...  Last time I mentioned I was able to practice my quilting again on a small scrappy piece.  Since then I finished binding it and have given it to my niece's little girl, Jade, as a doll quilt.  


Jade's going to have a new little sibling around Christmastime, so I'll be starting a quilt for the expected baby soon.


This little doll quilt was made from scraps of scraps of scraps!  Scraps from mask making were turned into a Scrappy Rail Fence quilt, which yielded scraps for this doll quilt. 

The other small quilt finish is what I'm calling Little Farmer, for the farm-themed scraps it's made from.  These were leftover bonus HSTs and other scrap pieces from the County Fair quilt I put together recently.


Don't you love it when you get another whole quilt from the main quilt?  I had enough leftover fabrics for the pieced backing too.  It ended up about 45 inches square.


I imagine little ones, as they get a bit older, playing with toy tractors on it, weaving through the "fields" of corn, hay, wheat, etc.  Here it is with the John Deere tractor and wagon that my daughter and her cousins all used to play with at Grandma and Grandpa's house some 30 years ago.


I quilted it with a simple meander in a gold colored thread.  I think it turned out really cute!


This one will be donated, but I'm not sure where yet.  I have to review my list of donees and see where the best fit for it may be (size-wise, etc.).

Linking to:  Can I Get a Whoop-Whoop? at Confessions of a Fabric Addict.


Saturday, September 25, 2021

Table Scraps Challenge - September

I've missed a few of the Table Scraps Challenge, but I'm getting back on board this month.  A couple days ago, I put on my quilting gloves for the first time since my finger surgery in early July.  Yay!  

I did a little practicing on a scrappy piece that will probably become a doll quilt.  Just some easy loopy free motion quilting, but boy, was I rusty.  (I'm going to use my oddball gray binding scraps, which I was auditioning in the photo below.)


I had another practice piece sitting on my sewing table from an orphan block.  It's actually the first test Four-Lily Block I made way back in 2012.  Earlier this year, I had come across the block in the orphan box and decided to sandwich it together as a practice pad to test the stitch tension on my machine.  So one of the petals was quilted (happily, the tension was fine), but the rest of it was not.

Hmm...why not finish quilting the block to practice my rusty quilting, and then (provided it doesn't turn out to be a total piece of garbage) bind it and make a little table mat?  It sounded like a plan.

Here it is after quilting and trimming.  Size is about 16-1/2 inches square.


I think I tend to do better quilting smaller things, maybe because it feels like I have more control over the area when I'm not wrestling extra fabric.  At any rate, it was good practice.


I bound it in a pumpkin colored solid fabric to play up the brown and orange bits in the flowers.


Here's a view of the quilting from the back.


So that's how my September table mat came to be.  It will go on a small table in my bedroom.

Linking to the Table Scraps Challenge link party at The Joyful Quilter.


Wednesday, September 22, 2021

Hunting for Arrowheads...in the Trash

 Alternative title, "How Blogging Saved the Arrowhead Collection."  

Whew, I am sighing with relief!  Earlier today, I was all set to write a post about how I finally framed the arrowheads my dad had collected through the years and got them out of the metal recipe box I'd stashed them in and into a decent shadowbox I could hang on the wall.  An interesting enough story.  

But when I got to editing pictures for the post, something was not right.  


I'd taken a photo of the grouping laid out on my cutting table a couple weeks ago, back when I was puttering in the sewing room and tidying things up.  I'd begun with the intention of putting them in a wheel-like configuration.  


Later that morphed into something more free-form and asymmetrical.  Along the way, I took several photos to share with my daughter Michelle for her input as to various ideas and iterations.


In looking back through the pictures today, though, I noticed my "final" shadowbox (directly below) was two points short!  


I went back and forth between photos and counted and recounted.  Sure enough, I was missing three arrowheads!  Two nice ones and another I'd decided not to include because it looked a little too perfect, like a souvenir arrowhead.

Where could they be?!  I quickly searched my sewing room, but I already had a sinking feeling: I'd thrown them away!

Then:  What day was it?  When was garbage pickup day?  Were they still in the dumpster?

With rubber gloves and mask, I went out to the dumpster with my husband to fish out the bag.  Through the clear plastic, I could see the narrow strip of batting I'd wrapped them in when I'd stored them in the recipe box.  Right near the top of the bag, fortunately.  Please-please-please let them be in there!

I opened the bag and pulled out the wad of batting.  I could feel a couple faint lumps.  I opened it carefully and there they were!  Woo-hoo—and whew, too!


After washing and drying them, I went straight to work, reopening the shadowbox and mounting the almost-lost arrowheads.  Luckily there was a little space on the upper right and left sides where I could squeeze them in and not throw things off noticeably.


Dad found arrowheads as a boy in the 1930s and '40s, usually while walking with his brothers and friends through farm fields in the spring.  The family truck farm was on the edge of a great marsh fed by the Rock River, which had been home to native people for thousands of years.  

I myself never went arrowhead hunting...until today.

When dad passed away a few years ago, my siblings and I divided up his small collection.  I stored my share in an old recipe box on a sewing room shelf.  When I came across them again recently, I decided it was time to bring them into the light of day and display them somehow.  So I bought a 10x10-inch shadowbox on Amazon.  

I had a couple old deerskins from my father-in-law from his hunting days.  He'd had them tanned by a local company in 1992, according to the receipt that was still in the box.  Many hunters in this area used to tan their deer hides and have them made into gloves, slippers/moccasins, coats, etc.  My thinking was to use the deerskin as a background for the arrowheads.  I cut off a small piece to use as a color sample to see how it might look in the frame with the arrowheads on top.

Long story short, after a couple layout attempts and with Michelle's helpful input, I ended up using a piece of black leather as the background and layered the deerskin on top.  Even though I'd just haphazardly cut a bit of deerskin off the big piece for a color swatch, I was starting to like the raggedy edges and asymmetrical shape of the piece.  It had movement and interest to it, and I liked that.


The black leather was from a coat my husband bought at Goodwill several years ago.  He stopped wearing it when it went too far out of style, but instead of sending it back to the thrift store, I cut the supple black cowhide apart and saved it for...whatever.  I flipped it to the reverse (suede) side as the background for a bit of textural contrast.

I used a super-strength fabric glue to glue the black leather to a foam board backing, and then the deerskin to the leather.  Then I used a hot glue gun to adhere the arrowheads.  I know that last sentence may send true arrowhead collectors into apoplexy, but it was the most workable solution for me.  I don't intend to take them out to trade with other collectors or sell or show; the shadowbox is for purely sentimental value.


So here (directly above) is the final-final result.  All arrowheads present and accounted for, on the wall next to the door of the sewing room.  What a story they tell—the original peoples', immigrant ancestors', Dad's, and my own.


Sunday, September 19, 2021

Sunday Sundry 9-19-21

It's been a minute.  I've been neglectful of this blog for a month or so, but rest assured all is well.  Just living life and enjoying the last that summer has to offer.  


If you give any credence to The Old Farmers Almanac predictions of the winter ahead, it may be one of the coldest and longest we've seen in awhile.  Whether or not that comes to pass, I've been reveling in the warmth of the sun as much as I can right now.  


That involves many walks, regular time spent on the deck (under the umbrella) reading, bird watching, cloud gazing, etc.  A day trip here or there.  

(Historic Indian Agency House at Fort Winnebago)

How I wish I could store it all up like a battery, but that's not the way it works.  Or is it?  Having those memories does help get me through the cold and dark days.  That and a full-spectrum light box.


One thing I have missed this summer, though, is biking.  You need functional hands to use the caliper brakes, but my left hand grip strength was very weak following finger surgery in early July.  By mid-August, my range of motion was better, the scar was healed, and it was time to start concentrating on strengthening exercises.  On the recommendation of my physical therapist, I bought the Therapy Putty she suggested and was very diligent with the exercises. 


Unfortunately, I may have worked a little too hard.  Although my grip strength normalized in the left hand, I gave myself the beginning of trigger finger in the process (by way of a somewhat tender lump at the base of the finger where the tendon moves through the sheath).  Not in the surgery finger, but the middle finger on my left hand.  


So now I have to back off the gripping motions and hopefully it'll calm down.  At my next therapy appointment, she'll reassess and see if I need to wear a splint on the left middle finger.  She did already size me for the splint, which is a ring-like contraption that immobilizes the middle finger joint.  


I really hope I don't have to wear it, though; if I do, my middle finger will be in permanent "salute" for several weeks, which will be a dead giveaway as to how I really feel about the subject.

* * * * *


Nevertheless, I have made progress on a couple things in the sewing room.  I put a green border on the small quilt I made from the County Fair quilt scraps, bringing it up to a more ample size for a baby quilt.  I basted it recently and it's awaiting quilting.


I also finished piecing the Waverly quilt top that I intend to gift to a nephew.  It went together really nicely.  


I did buy the suggested ruler, and I'm glad I did.  It helped both in cutting the diamond shaped pieces, and also in the block trimming process.  Normally I try to get by with what I've got when it comes to rulers, but after watching a YouTube video on how to use the DiamondRects ruler when making a Storm-At-Sea quilt and seeing how helpful it seemed to be, I went for it.  Again, very glad I did, and I would highly recommend it.


Honestly, I was feeling a little unenthusiastic about this quilt, thinking it'd be all ho-hum sewing with dull colors, but I really, really like how it turned out.  In fact, I'm thinking I might like to make another one to keep.

* * * * *

I came upon this old quilt pattern among a group of vintage sewing patterns a friend gave me several years ago.  


It had a handwritten note on it that said is was from the 1940s.  It's an applique quilt pattern called "Early to Bed," with a little boy in his pajamas holding a candlestick.  


I thought it was an interesting and charming quilt idea.  I've seen a lot of Sunbonnet Sue and Sam quilts, but not one like this.  Have you ever seen this motif?


Monday, August 16, 2021

Puttering and Decluttering

I've been puttering in the sewing room this past week, mostly on non-sewing, organization type stuff.  I'm waiting for a pattern and fabric to arrive that I ordered from Etsy for my nephew's quilt.  I'm still rehabbing my left finger/hand and not up to free-motion quilting just yet, so it felt like a good time to tidy things up in the sewing room.

 I finally (FINALLY!) put away all the thrifted shirt fabrics that had been stacked on the corner of a sewing table for years (yes, YEARS!).  Of course, in the meantime, I'd added more shirts to the pile.  I think I was afraid they wouldn't all fit back into the large three-drawer rolling cart they came out of and that I'd need to rethink storage (or, you know, make a quilt or three), so I put it off and put it off.  But lo and behold, they all fit into the drawers just fine, and I was able to roll that cart under my sewing table and free up some precious floor space.  Woo-hoo!  

Then I sorted the rest of my mask-making supplies and put them into a much smaller, shoebox-size plastic tote.  I'd been using t-shirt strips for the mask ear loops, so whatever was left of the t-shirts got cut up for dust rags.  That felt good, too.

I hung some 12-inch cork squares on my wall.  Another long procrastinated on project (again, YEARS) that took me all of 15 minutes to do.  Why do I procrastinate on these things? I wondered.  I was never going to have the "perfect" spot for them, so I just stuck them to a "good enough" place on the painted concrete wall of the basement.  Now I finally have someplace to pin things (pattern directions, sample blocks).  I was skeptical whether the adhesive would hold to the concrete, but I slapped them up anyway and if they fall off, they fall off.*  They were doing me no good in the package. (*Unfortunately, between the time I started writing this post a day or two ago and now, they did indeed fall off the wall...wah-wah-wah...but at least now I know what doesn't work, I guess?)


I also decided it was time  to deal with the vintage '60s or '70s fabrics I've been collecting over the past 10 or so years.  They'd been just sitting on a shelf, waiting for who knows what.  


Was I going to sell them? Make something with them? Donate them to the local community theater for costumes? Drive them back to Goodwill?.  


I love the neon bright colors and wild patterns, but they're all synthetics/poly and not something I'd be able to quilt with.  


Call me sentimental, but I wanted to remember them after they were gone, so I draped them on my headless mannequin, Dolly, so I could take some photos.  On a lark, I posted them on Facebook where a friend fell instantly in love and asked if she could buy all of them!  I told her she could have them for the cost of postage.  


So I packed them up in a large flat-rate box and shipped them off to North Carolina.  She's already received them and is so excited.  That makes me happy!  Another thing that languished for years on a shelf, but is now finally moved on to a fellow vintage fabric aficionado.  

I think there is something about clearing out and making space for other things or energy.  That sounds kind of woo-woo, but for me I know that when my clutter/stuff/disorganization threshold edges toward its upper limit, my creative mojo takes a dive.  Clearing things out gives me a more balanced feeling and like I'm making space for creativity and new opportunity.  Does that resonate with you, too?  

Where things kind of ran aground was when I was sorting through old patterns...so many vintage patterns from my mom and other relatives, friends, and those I've picked up at thrift stores and garage sales.  In the past, I've shared some with other sewers whom I've met through blogging, and I've sold some online.  At this point, I was just taking stock of what all was there in the bins and drawers that I might want to do something with to whittle down the collection.

(Glad I missed out on this "fun fad.")

Well, that ended in a case of the giggles!  The more I looked, the sillier some of the old patterns struck me!

(1970-When dressing like a naughty nurse in junior high was all the rage.)

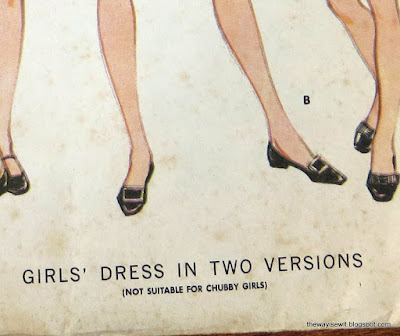
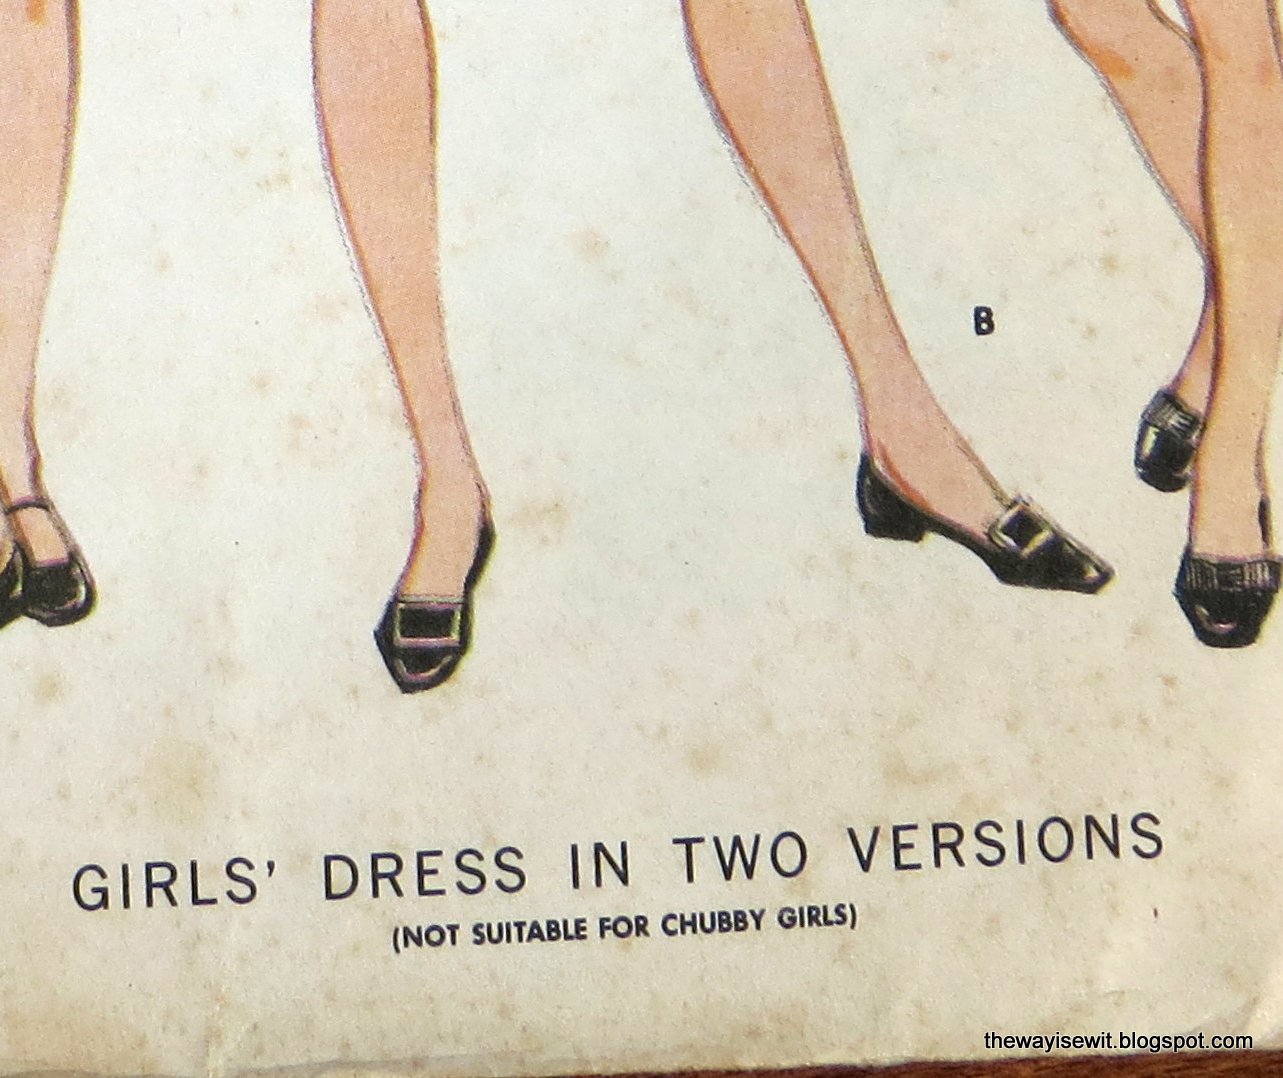
Thank goodness some things have changed...like "chubby sizes" for girls (or "husky" for boys).

(Always a good idea to read the fine print...)

(Ah, the 1960s, when fat shaming was all a part of growing up.)

Culturally and societally, this was the water I grew up swimming in.  Now I look back at some of the stuff that was "normal" and have to laugh, or, in some cases, shake my head. 
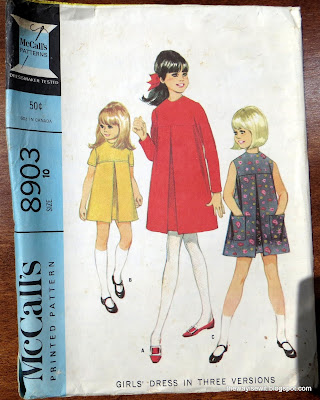
(Never fear, this one has plenty of breathing room...and pockets!)

I remember thinking I looked more like the "chubby size" pictures in the catalog, and I was heavier than my older sister growing up.  But mom just worked her magic when she sewed the same pattern for us, and they fit each of us to a tee.

Anyway, I didn't make any decisions on what to do with the patterns at this point.  I'll have to revisit them again another time.  Would you be interested in seeing more of them in future blog posts?  Let me know in the comments.

As far as my nephew's quilt, I took stock of my low-volume and other neutral fabrics and came to the conclusion that I really didn't have that much to work with.  Browns, beiges, grays, etc. are few and far between in my stash.  

Waverely Quilt Kit via Etsy

I did some looking online and found a cool quilt idea that came as a standalone pattern or a kit; ultimately, I decided to get the kit.  I really liked it just as it was shown, and I think it'll be perfect for him.  I've always wanted to make a Storm-At-Sea quilt, so this will give me the chance to check that off the bucket list.