Tuesday, December 29, 2020

Foster Quilts

I've been making some donation quilt tops during the past couple months.  One with my own materials, and others from kits or orphan blocks sent my way by Jo at Jo's Country Junction to be put together and donated.  

I've started to think of these as foster quilts:  Something I have the temporary care and nurturing of along their journey to becoming a finished quilt and ultimately landing in the arms of someone in need of warmth and comfort.

First up, the one from me.  When The Joyful Quilter put out a call for quilts (or parts thereof) for Lutheran World Relief, I promised to send something her way.  I started pulling some older, half-forgotten things from the stash, a bit like going through and cleaning out the pantry.  What hasn't moved in a while and needs to have another life?  A little of this and a little of that, and pretty soon I had a nice subdued palette of florals and coordinating fabrics for a simple patchwork quilt.


Pictures don't really do this quilt justice.  It had such a soft, cozy vibe.  I also put together a backing and binding and sent everything off to The Joyful Quilter for quilting and donation to LWR.


Then I started on one of the projects that Jo had sent, which I presume was sent to her by one of her readers.  Unfortunately, I don't know who that person was.  If anyone reading this recognizes this, please let me know.  


The blocks were already pieced.  It just needed to be put together as a top.  The maker had included extra 2.5-inch strips and other coordinating fabrics, so I used those to sash the top and make borders.  


There was a yard or so of a rust colored solid fabric the maker sent along, and I had a similar rust colored print in my stash.  Those pieces, along with some more of the 2.5-inch strips, were enough for a kind of improv backing.  The remainder of the strips were just right for a scrappy binding.

(Backing)

This turned out to be one very pretty quilt!  It was a little large for me to quilt on my domestic machine, however, so I sent it on to Karen, a quilter I connected with through Jo's blog, to be quilted and donated.

Then I finished a Thimbleberries quilt kit that had been sent to Jo by "Connie in Wisconsin."  Everything was there and complete to make this darling quilt top.  It went together fast, and the fabric quality and instructions were excellent.  


I remember when Thimbleberries quilts were quite the popular thing (this kit was dated 2002), but I had never made one until now.  I can definitely see what the appeal was!  I sent this top to Karen, along with the other one, for quilting and donation.


This last quilt top was a made with sampler orphan blocks sent by Jo.  Again, unfortunately, the maker of these blocks is unknown to me.  Please let me know if you recognize them as yours.


Once again, the blocks were already done.  I just had to bring them all to a uniform size and sash them with a cafe au lait brown solid I had on hand.  This one was also a good size, so I asked Joyful Quilter if she'd like to finish another one for Lutheran World Relief, and she said she'd be glad to.


It makes me so happy to see these quilts fostered to completion by various hands in the "quilt village."  I'm happy to have played a small part in that!

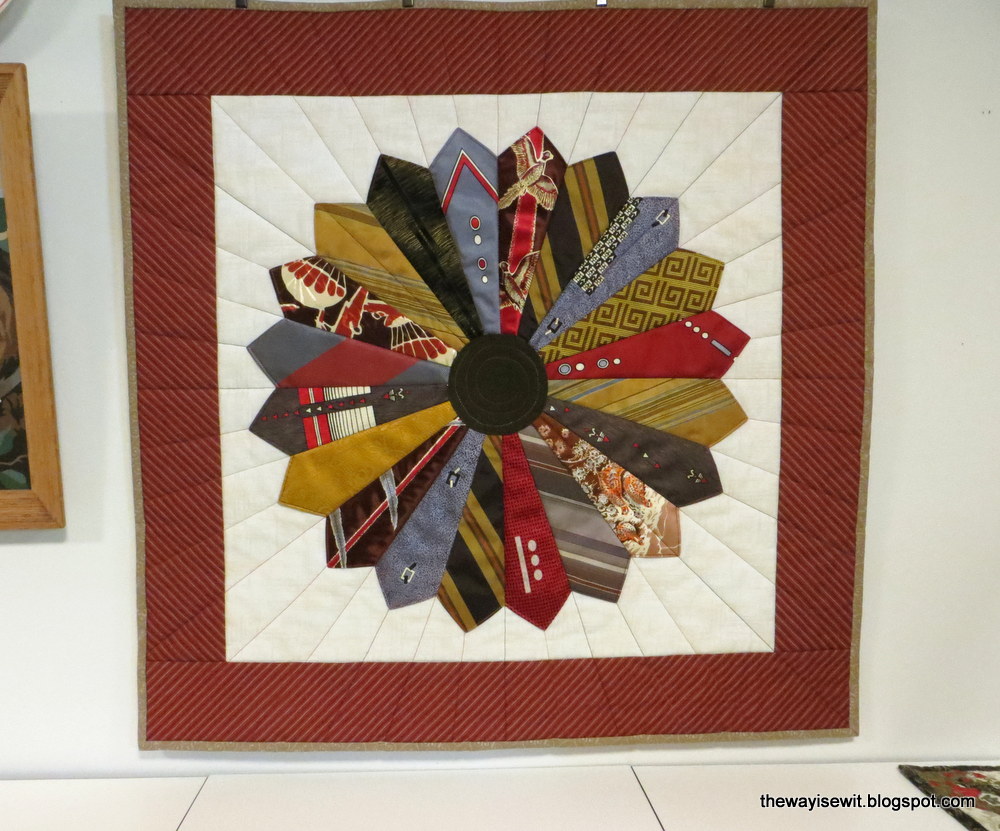
And now for a technical thing.  I'm trying something different with this post.  Lately, my pictures seem to be blurrier in Blogger (and in my feed reader, Feedly), so I've increased the file size of the pictures uploaded for this post.  Let me know if it causes any noticeable issues as far as page loading, etc.

Sunday, December 27, 2020

Second Necktie Project Finished

Yesterday I finished necktie wall hanging number two.  


It was inspired by a wall hanging in my entryway that I was taking down a couple weeks ago to replace with a more holiday-themed decoration.  All that Pinterest browsing for necktie projects and the inspiration was literally dangling right in front of my nose!

I had made it from a kit I picked up somewhere in the early days of my quilting experience.  Luckily, I still had the instructions (and homemade templates).  It's dated 2003, so I must have made the original kit wall hanging within a year or two of that.


I had set aside certain other ties to use for a second project while I was working on the first one.  The second project would use different blue and red ties, including the wild blue paisley and red swirly silk ties, which were my personal favorites.


First was to stabilize the fabrics with interfacing, using the Bi-Stretch Lite again.  I have to say the more I worked with it, the more I appreciated this particular interfacing.  It worked especially well on the finicky silks, as well as the poly, acetate, and rayon blends.


Then it was just a matter of cutting everything out.  I had to be judicious about cutting the pieces so as to get the right number from the limited amount of fabric available in a necktie.  

I played around with the layout a while, changed a few things around, and then sewed up the nine blocks.  As far as sashing fabric, I'm really trying to stay out of the stores and heed that little voice in my head that says, "Use what you have."  I auditioned batiks...oh, no.  Black fabric played up the drama, but seemed a little too depressing.  Kept coming back to this silvery gray.  I think it has enough variation in the gray to complement the shimmer of the tie fabrics.  Is it perfect?  No, but good enough.


These pictures are reading more of a pea soup green color in the lower corners of the blocks than they appear in real life.  They're more of a gold, or maybe olive gold color. 


For the quilting, I experimented on a sample with a meander and some other designs, but it reminded me of a quilted bathrobe in texture, and that's not the look or feel I wanted.  So once again, simple straight lines won out.  


I toyed with the idea of sewing a small decorative button in the center of the "tulip" in the gold squares, but then I thought about tie tacks (pins).  If my friend has any of those from her late husband and wants to embellish it, she can give that a try.


This time I had a plan for some of the labels on the back.  I arranged them on the hanging sleeve before I sewed that on the back and stitched them down by machine.

All in all, I'm happy with how it turned out.  I'm not sure if there is another project in me to use the leftovers, but for now I think I'll take a break and do something else for a while.


Saturday, December 19, 2020

Necktie Wall Hanging

Mission accomplished!  The wall hanging from neckties that I was aiming to finish for my friend by Christmas is now done.  I put the final stitches in the binding yesterday.


Then I had the afterthought to hand sew some of the labels I'd taken off the ties onto the back of the quilt.  Many of these ties were from the same local clothing store (which closed some 50 years ago) and of the same brand.  It was neat to see how the brand label had changed through the years, along with the style of tie.


Other than stitching the inner and outer edges of the Dresden to the backing fabric, I relied on the way I was going to quilt it to further secure all the layers together.  I started in the open center circle, stitching in the ditch of each of the blades of the Dresden in straight lines radiating outward, and continuing through the background and into the border.  Like rays, I guess.

(Using painter's tape as a guide.)


I used a variegated Sulky thread in shades of gold, red, and dark brown to echo the shimmer of the ties.  Hard to tell on these pictures, but I like that it's not just a flat-looking thread.  The bobbin thread was Aurifil, and I also used that to ditch quilt the square where the background and border meet.


Finally, I added the center brown circle from the only wool tie in the group.  I had to maneuver around a few holes and thin spots, but found an area of viable fabric to cut the circle from.


Third time's a charm when it came to free-motion quilting that center spiral.  I even drew it in chalk first.  Sheesh!


Normally I don't add a rod pocket to my wall hangings because I use curtain rings to hang them at home, but I added a pocket on this one to keep things easy for the recipient.

Here, in this picture below where I used flash, you get a better sense of the texture of these ties.  They're really smooth, shiny, and silky feeling!


Can you tell the gentleman was an avid outdoorsman?  I love those pheasant and grouse ties (at about the 12:30 and 4:30 positions).  Also, the geometric mid-century graphics on several of the other ones.  And that Greek key.  Okay, I love them all!


I'm going to take a stab at another wall hanging from a different grouping of ties I've set aside, now that I have the hang of this a bit.

Friday, December 18, 2020

Progress Made

I got the other interfacing in the mail the other day, five yards of it, but the small package weighed only a couple ounces.  Uh-oh, I thought.  This doesn't feel right.

Imagine your sheerest of sheer undergarments.  That's what this Pellon 865F Bi-Stretch Lite interfacing feels like.  This is all of it piled on the cutting table.


See how it drapes and how you can see my scissors through it?  


You also might note that little snag at the top of the scrap above.  You're going to need those sharp scissors to cut this.  The rotary cutter tended to snag it and also embed it into any groove line on the cutting mat.  ("The Groove Line" by Heatwave.  Yes, I just had to stop and watch/listen to that song!  Ah, such fun memories of the disco era.)


But I forged ahead and started fusing it to the necktie fabrics.  I cut a chunk of the tie roughly the length of my Dresden template and then fused the interfacing onto the back side.  

Despite supposedly having a lower melting point for the adhesive, I found I needed to set my iron on #6 Wool (#7 is Cotton on my iron, and #3 is Silk, for comparison), use a DRY iron with pressing cloth on top, and count 15 full seconds.  Anything less than that amount of heat or time wasn't enough to get a permanent adhesion.  But the silky tie fabrics all seemed to be okay with that, so on we went.


I then cut out the Dresden templates and sewed across the tops to make the point.  I had changed out my machine needle to a 70/10 and had Isacord in the bobbin and a Sulky rayon thread on top.


This interfacing did not make the pieces feel or sew more like cotton, so I had to take care and pin where needed.  The fabric retained its slinky feeling, which if you were going to make a garment, that's what you'd want.  I was just happy it was stabilizing the fabric and staying put.


I got out my package of silk pins that I hadn't used in years.  I remember buying them when I was making my college graduation dress!  (As I write this, the radio in the basement is currently playing Phil Collins' "In the Air Tonight," which I remember had just come out my senior year in college.  "Hold on..."  I didn't mean for this post to be such a musical trip down memory lane, but that's how the morning is going.)


Okay, so I got the pieces sewn together just fine, and pressed them.  I used a pressing cloth anytime I came near the ties with the iron.  After having washed and pressed each one when I first got them, I knew some of them were funny with direct heat, and I didn't want to screw anything up now.

Then it was time to pin them down to the background.  Again, a lot of silk pins were used to keep them in place.  I machine stitched the Dresden plate down along the inside circle and the outer pointed edge.  The rest of the stitching happened with the quilting.  More on that tomorrow!

The bottom line is the new interfacing worked just fine for this small wall hanging that I want to get done by Christmas.  Were I to be making a larger quilt and had more time, I might keep looking and experimenting.  Overall, though, I'm happy with the way the Bi-Stretch Lite worked for these vintage ties.  I'm going to start another small project with some of the rest of the ties, and I'll continue to use it for that.

Monday, December 14, 2020

This and That

Last week, we were marveling how nice it was to be able to go for a walk in December with temps hovering near 50.  Then the weekend came and with it snow, enough to get the snowblower humming to clear the driveway.  It's definitely beginning looking a lot like Christmas here in Wisconsin.


Mm, zucchini bread fresh from the oven on a snowy weekend. What could be better?  Okay, losing 10 pounds, maybe, but let's not go there.  Besides, I wasn't going to let those two zucchini in the fridge go to waste.  (To waist?  Oh, dear.)

I've tried a lot of gluten-free, dairy-free zucchini bread recipes through the years, but I think I've finally settled on my own that I've adapted from a "regular" recipe.  I substitute one-third of the flour with almond flour, and make up the rest with gluten-free flour (I've used Bob's Red Mill Gluten-Free 1-to-1 Baking Flour and Great Value brand gluten-free flour from Walmart with success).  I use almond milk instead of regular milk.  Here's the complete recipe:

Gluten-Free Zucchini Bread

1/2 c. unsweetened almond milk + 1/2 t. vinegar (let curdle a few minutes)

1/3 c. white sugar

1/3 c. brown sugar

3 T. avocado oil (or your oil of choice)

1 egg

1/2 t. vanilla

1 c. gluten-free flour

1/2 c. almond flour

1/2 t. xanthan gum (improves texture of gluten-free baked goods)

2 T. ground flax

1-1/2 t. baking soda

1/2 t. baking powder

1/4 t. sea salt

1/2 t. cinnamon

1 c. shredded zucchini (I use the food processor, no need to drain)

1/2 c. chopped walnuts

Preheat oven to 325 degrees.  In a small bowl, stir together the gluten-free flour, almond flour, xanthan gum, flax, baking soda, baking powder, salt, and cinnamon.  In a medium mixing bowl, whisk together the egg, oil, vanilla, sugars, and milk.  Stir in shredded zucchini.  Add dry ingredients and walnuts and stir until combined.  Pour into greased loaf pan.  Bake at 325 degrees for 50 minutes.  Makes 1 loaf.

This recipe also makes a good carrot bread.  Just use a cup of shredded carrots in place of the zucchini.

* * * * *

I ran into a bit of a snag with the neckties project.  The interfacing was not adhering well to the tie fabrics.  I had ordered a whole bolt of Pellon 911FF featherweight fusible interfacing based on what I'd read others had used when making necktie quilts.  Well, it just wasn't working for me.  It would partially adhere, or adhere but then release when I started sewing the pieces together.  I made just this one sample block and then decided to do some more research.

(All from neckties - love that red/purple print!)

According to the Pellon website, the better interfacing for silk and acetate is their 865F Bi-Stretch Lite interfacing, which is a lightweight woven with an adhesive with a lower melting point.  I'll admit the "stretch" part of the description concerns me a little bit, but we'll see.  I've ordered several yards of that and it should arrive sometime this week, if it's not delayed due to the holiday package volume.  Fingers crossed it arrives and does what it needs to do, as I'd like to get at least one of the tie projects done by Christmas.

* * * * * 

I have made a baby quilt for a little boy who's due in January.  I used a free pattern on Jo's Country Junction called Stacking Bricks.  It turned out super cute!


I had this fun little robot fabric in my stash, so I pulled some bright scraps to coordinate with it.  I cut the outer border at 4.5 inches instead of the 2.5-inch border in the pattern, so I could see more of those endearing little robots!


The backing was pieced from some of the leftover bricks running down the center, and a striped binding finished it off.

Friday, December 4, 2020

The Weird and the Wild

Well, that was weird.  I just got an email of one of my old blog posts from 2018, apparently sent out by my feed burner.  I apologize if any of you who subscribe by email got one, too.  I have no idea how that happened.  So random!

But since we're here, I might as well give you a peek at what I've been working on this past week.  Deconstructing vintage ties!


A friend gave me a trove of her late husband's neckties to make her something from them.


I haven't decided what I'll make, but I have a few ideas percolating.  In the meantime, I'm admiring each one that I'm taking apart, hand washing, and pressing.  I do a few every day.  Here are about a dozen fully processed ones hanging from my file drawer pulls.


This past week I've watched more YouTube videos and learned more about vintage ties and fabric care than I would have ever imagined!


I learned, for instance, that "a tie is not a tie," as far as fabric goes.  You might think they're all "silk" but they can be acetate, Dacron, wool, rayon, or a blend.  And how they behave when they're washed and ironed will vary, depending on the fabric content, weave, dyes, etc.


At first glance, I thought this print was of butterfly wings or birds.  On closer inspection, though, they weren't birds; they were planes—and parachutes!  A handful of this group of ties are real silk, and this is one of them.

They're all fabulous, though.  They run the gamut from the late 1940s through the 1980s, I'm guessing, but I'm no expert (yet!).  It's like sifting through a time capsule, a lifetime in ties. 


Wide, skinny, short, long, lined or simply rolled edge.  Such a variety, and I'm really enjoying handling each one.


I hope I can do them justice in the final project(s).  Stay tuned!

Tuesday, December 1, 2020

Friendship 360 Quilt Completely Finished

It's hard to believe I started this quilt during the 2016 election year.  That was when a group of us were making Quilty 365 appliqued circle quilts.  Four years and another presidential election cycle later, I am happy to say that my Friendship 360 quilt is finally completely done!


I got the top done in August 2018 (blogged HERE) and in the fall of 2019 sent it off to my local longarm quilter, along with a couple other quilts.


One by one, the quilts were returned to me and I trimmed and bound them.  My circle quilt was the last to come back home in early October.


It's so nice to see a quilt again after it's been away for awhile.  Absence really does make the heart grow fonder.  Sandy did a nice job with the overall quilting design.


I put the binding on it right away and got it on my bed just in time for the first real cold snap this fall.  Waking up in the early morning light to appreciate the colorful variations of individual circles...well, it's just a great way to start the day!


You can read more about the process of making this quilt by clicking the Quilty 365 tag in the sidebar on the right (or HERE).  It's a fun trip down memory lane to skim through those posts.

* * * * *

The sandhill cranes are migrating, and great flocks of them can be seen and heard as they gather together to prepare for their trip south.  What a wonderful sight and sound!


I snapped a picture of this pair preening, during a walk near the marsh in October, around the time I was finishing the Friendship 360 quilt.