Last fall, I wanted to take down the old wallpaper in the kitchen and paint the walls. My soon-to-be sister-in-law offered to help, I said okay, so we did and it turned out great!
The End.
Just kidding! Yes, we did remove the wallpaper and paint the walls, but no, that wasn't the end. It was just the beginning.
 |
| (Dining area of kitchen - Before) |
This will be a familiar story to many of you. You want to do One Thing, but that leads to Thing Two, which can't be done until Thing Three happens. And if you're going to do Three, then you may as well do Things Four, Five, and Six. And also Seven and Eight, while you're at it, because that just makes sense.
But I'm not complaining one bit! I am very glad we did all the Things, and I am enjoying a refreshed looking kitchen that makes me happy to spend time in it.
 |
| (Kitchen - Before) |
Now if you're thinking this recap is going to rival an episode of some popular home makeover show, please allow me to adjust your expectations. No walls were removed, no square footage was added to our tiny kitchen, and the flooring and cupboards all remained the same. In fact, I still have the door missing on one of my cupboards; after three requests to have the contractor come back and put it on with the new hinges it needed, to no avail, we've pretty much given up. We are becoming resigned to the "open shelving" concept in that corner of the kitchen...*sigh*...almost.
First, I must tell you that I have a total gem of a soon-to-be sister-in-law! Her name is Karrie. During the past few years, I've seen the magic she's done in her own home and also in getting my brother's old house ready for sale. She has that wonderful eye for design and flair for decor that some people seem to be naturally born with. Other people, like me, do not have this in their DNA. What a gift it was to have Karrie's input and skills when it came to my kitchen! I trusted her judgment and told her if she had any ideas or comments to just give it to me straight, and she did!
In the late '90s, I'd taken the old wallpaper off the kitchen walls, but (like an idiot) I put wallpaper right back on! Ugh...what was I thinking? Well, I guess that was the thing back then. Some of my friends tell me wallpaper is back on trend again. What goes around comes around, I suppose, but it's not for me anymore. The kitchen was the last remaining room in the house with wallpaper and it was time to say goodbye.
 |
| (Removing wallpaper - this was an easy section) |
It took a while and a lot of elbow grease (and vinegar and razor blades), but it finally all came off. Then there was the matter of fixing the walls underneath. More scraping and patching and sanding to get them smooth.
But before the walls could be painted, the ceiling needed painting. That took two coats. Then the walls were primed and textured and painted. Karrie did all of the painting herself. She's such a skillful painter. Here she is with a tiny brush painting the little gap between the window trim and the bulkhead above the sink. No sweat!
 |
| (Karrie painting above the window) |
Somewhere along in the process, she suggested we update the 1970s dark walnut stained baseboards by painting them a creamy off-white. The doors were also walnut—there were no less than four of them in and around the kitchen—so it seemed natural to redo those as well. We ended up buying four new six-panel doors and painting them to match the baseboard trim. Of course, that meant new door frames as well, so a carpenter came in for half a day to hang the new doors.
 |
| (Old walnut doors and trim) |
It had also been noted that my kitchen countertops were looking kind of sad and dated. So we decided to replace the countertops—which meant a new sink and fixtures, of course—and why not do a complete tile backsplash while we're at it? (The old backsplash was just a single run or so of green tile.)
 |
| (Karrie and Darrell working on the new trim and doors) |
And let's also get new appliances ordered—in for a penny, in for a pound—replacing the '90s era stove, refrigerator, dishwasher, and microwave with stainless. It took some research to find a refrigerator that would fit the space the old one had occupied (fridges are taller and wider these days) and to find a microwave that was just right for the space above the stove.
 |
| (Countertops and appliances going in) |
Finally, all the appliances arrived, and a different contractor we'd hired for the countertops came and put everything in and did the plumbing for the sink and dishwasher. Turned out we needed some extra plumbing work done for it all to work, but he was able to do that the same day and get it done.
 |
| (Dove gray tile to right of faucet) |
When it was time for the tile work, Karrie and my brother Darrell volunteered to do it themselves. I'd bought a pretty dove gray tile for the backsplash, but after part of it was already up on the wall, Karrie noticed it seemed to be too dark and made the kitchen seem smaller and dim. I was a little surprised when she suggested we change course midstream, but again, I completely trusted her eye for that kind of thing.
 |
| (Darrell taking off the gray tile) |
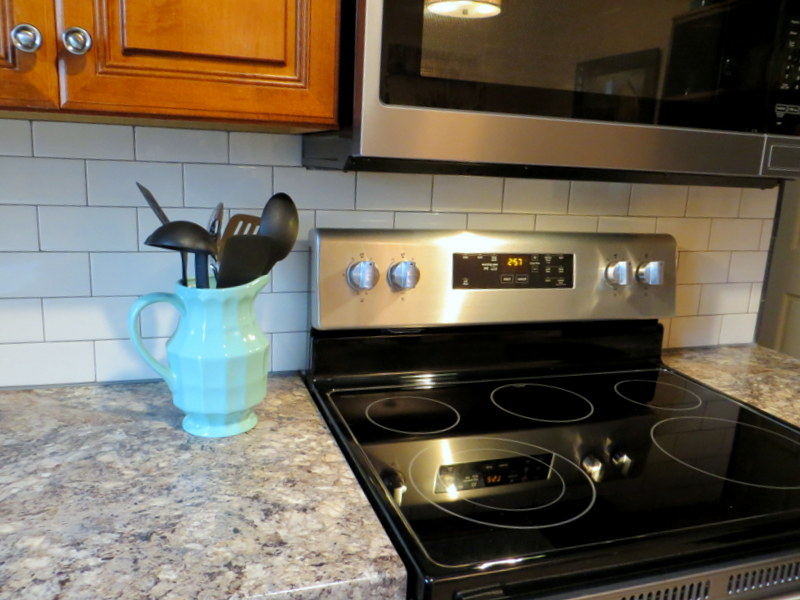
So as my brother knocked off the gray tile put on the day before, Karrie and I ran to the local home improvement store and bought a completely different, biscuit colored subway tile. It cost quite a bit less than the gray tile I'd originally bought, so that was a nice silver lining. And she was absolutely right on about the lighter colored tile. It looks so much better and brighter in the space.
 |
| (New subway tile backsplash) |
Then it was time for the fun part, decorating! I once again deferred to Karrie's eye. She found a cool, vintage-looking fabric to make new kitchen curtains (and whipped them up herself). She used a few pieces of furniture and decor hiding out among the cobwebs in my basement and re-imagined/repurposed them for the kitchen.
 |
| (Antique Ethan Allen chest and hutch) |
One of the coolest transformations was this solid maple Ethan Allen chest and hutch from my husband's childhood. I had been using the lower chest in the dining room as a side table, and the hutch that sits on top had been relegated to the basement for storage. Karrie brought them together again in the kitchen!
 |
| (Restyled chest and hutch) |
She painted the piece black and lightly distressed it. Put a wood applique on the front for a little flourish and changed out the hardware.
I asked my brother to cut a hole in the back of the hutch so I could thread a cord through it for a power strip so we could use it as a charging station for our electronics while hiding them behind the door. And hide the mail and papers!
Karried styled the shelves by wandering around my house and pulling together vintage and other things I've collected over the years, as well as adding a couple of her own items.
We picked out a new table and chairs that
fit the space and our needs from Wayfair. It's perfect for hubby and me in our eat-in kitchen.
The old window was something I had in storage in the basement for at least 15 years. I'd intended to repurpose it in some artsy way for wall art, but never really had a definite plan. But Karrie had a plan! She painted it to match the cream colored trim in the kitchen and decorated it just so, adding a couple vintage coat hooks, and used some of the leftover fabric from the kitchen curtains. I hung a couple vintage kitchen items on it, she added a wreath, and voila!
 |
| (Vintage paint-by-number in custom frame) |
She and my brother also made a different frame for one of my beloved vintage paint-by-numbers and made that into proper wall decor as well. We teased back and forth a little on that, but after a bit of eye rolling, she came around to the idea of using it in the kitchen. He-he!
 |
| (Dining area of kitchen - After) |
All in all, it took from about mid-September to mid-December to finish the job. I really enjoyed all the conversations and laughs we had together in the process...getting to know each other better...all the little twists and turns, etc. It was altogether a great couple of months, giving the kitchen the update it needed. The whole thing just makes me smile!