
 Heading for the finish line on the Double Pinwheel String Quilt!
I had to Google how to spell homestretch (one word or two), and it's a racing term, of course. Did you know the Kentucky Derby happens next Saturday? I did not. Want to test your knowledge of the Kentucky Derby? Click here for a quiz. I got 5 of 10 correct, which is funny because I guessed at every single one.
Back to DPSQ:The Final Chapter. Let's sew this thing together, already!
 We will be making 16 large pinwheel blocks, each consisting of four of the block units that you made in Part 3.
Step 1: Take four random block units that you made in the Part 3, and arrange them into a pinwheel.
Sew the top two block units together, then the bottom two. Press seams toward the red pinwheels. Since the paper has been removed and there are no more bias edges to worry about, I used a steam setting on my iron at this point, being careful to press gently and not stretch the pieces.
Step 2: Sew the two 2-unit sections together to make a block. Again, you will be pressing seams toward the red pinwheels, but first I am going to tell you how to do a little trick in the center of the horizontal seam you just sewed to make it lay flat. Working on the back of the block, unpick 2-3 threads in the center on two of the seams, and open the center (you should see a tiny pinwheel in the center). Finger press this area flat, then gently press with your iron on both the front and back of the block.

 (Back of Block)
Repeat Steps 1 and 2 for all blocks. You will end up with 16 pinwheel blocks, each 15-1/2 inches square.
 Step 3: Cut sashing strips and outer border from your remaining 3 yards of red fabric as follows:
- Cut 10, 1-1/2 inch strips x width of fabric (WOF).
- From the 10 strips you just cut, cut 20, 15-1/2 inch segments. These will be your vertical sashing strips between the pinwheel blocks.
- Cut 4, 1-1/2 x 68-inch strips from LENGTH of fabric (LOF). These will be your horizontal sashing strips, above and below your rows of blocks. Your rows will be approximately 65 inches across, but we'll cut the sashing strips a bit longer and trim as needed.
- Cut 4, 6-1/2 x 85-inch strips from LENGTH of fabric (LOF). These will be your outer borders. Again, we're cutting them a bit longer than necessary.
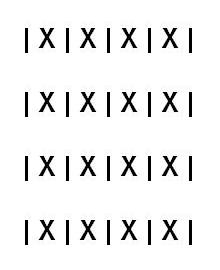
Now, cut me some slack here; I don't have any other program (that I comprehend) to illustrate this, so you get my mad Paint grafik skilz.
 Press seams toward red sashing strips.
Step 5: Sew long horizontal sashing strips between each row and at top and bottom as follows (where ------- = horizontal sashing strip):
 Press seams toward red sashing strips.
Step 6: Cut 8, 2-1/2 inch strips x WOF from blue fabric for inner border. Join two strips end to end with a straight 1/4-inch seam. Press seam open. Repeat this with remaining strips so that you have 4 long, 2-1/2-inch strips for inner borders.
Step 7: Attach a blue border strip to the left and right sides of quilt top. (You all probably know how to measure for and attach borders, so I won't go into detail about that here.) Press seams toward blue border. Then attach a blue border strip to the top and bottom of quilt top. Again, press toward blue border.
Step 8: Attach red outer borders in the same manner as Step 7, i.e., to the left and right sides, then top and bottom. Press toward red border.
Step 9: Layer with backing and batting; quilt and bind as desired.
There's one more important step: Stand back and admire your beautiful quilt! Hooray! You deserve roses!

Anyone for a mint julep?
* * * * * * * * * * * * * *
Questions, comments, noted errors/omissions? Let me know, and I'll do my best to clarify.
3 comments:
I love looking at your quilt. It is so captivating. Thank you for posting this tutorial, I will making my own version of this soon.
this is so very beautiful!
Hi, Paulette. Well you have to love the internet. Here it is 13 years later and I just found your quilt and I love it! It is definitely the next one on my list. (My list is long, but I work on many at a time, so I'll be starting it soon.). I love your choice of colors and I'll be using something similar, definitely the red for sure. Thanks so much for sharing.
Post a Comment